Running an AI Interview
Launch automated interviews to streamline your screening process and deliver a consistent and efficient candidate experience.
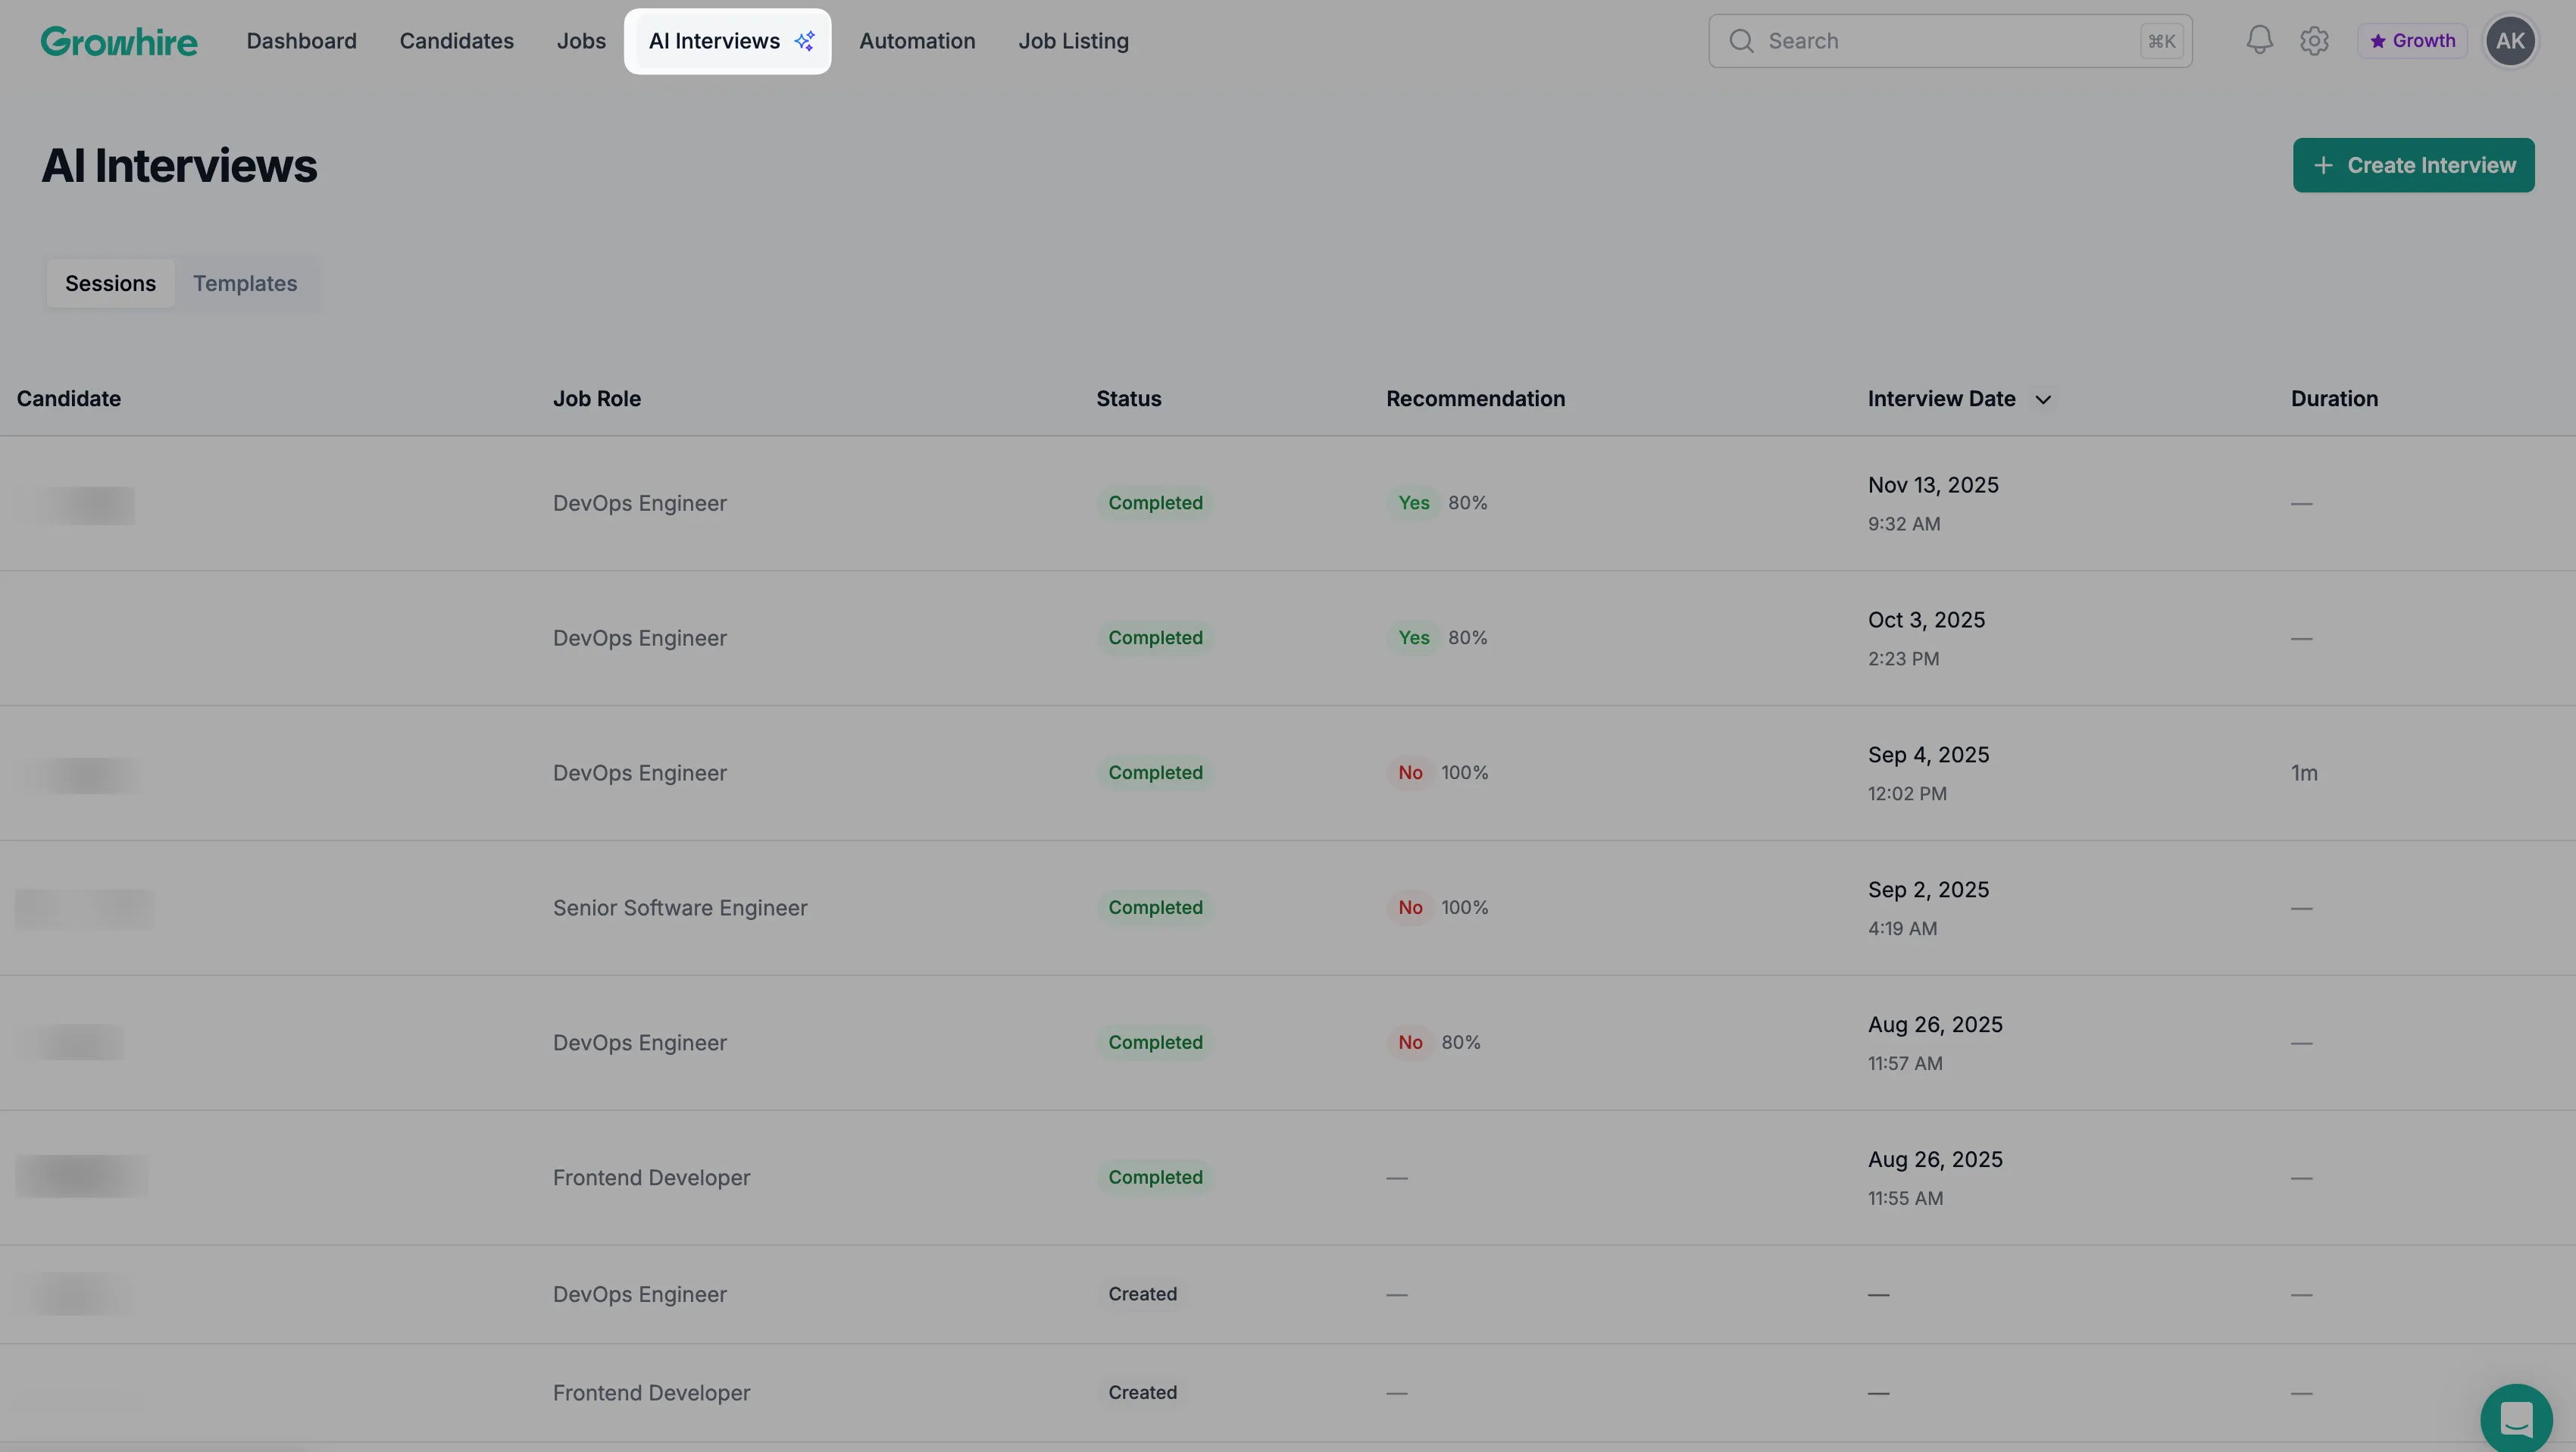
To get started, navigate to AI Interviews in the main navigation bar.
Create Interview Templates
Section titled “Create Interview Templates”Configure your interview questions in advance, edit the evaluation criteria, and review the settings before inviting candidates to an AI interview.
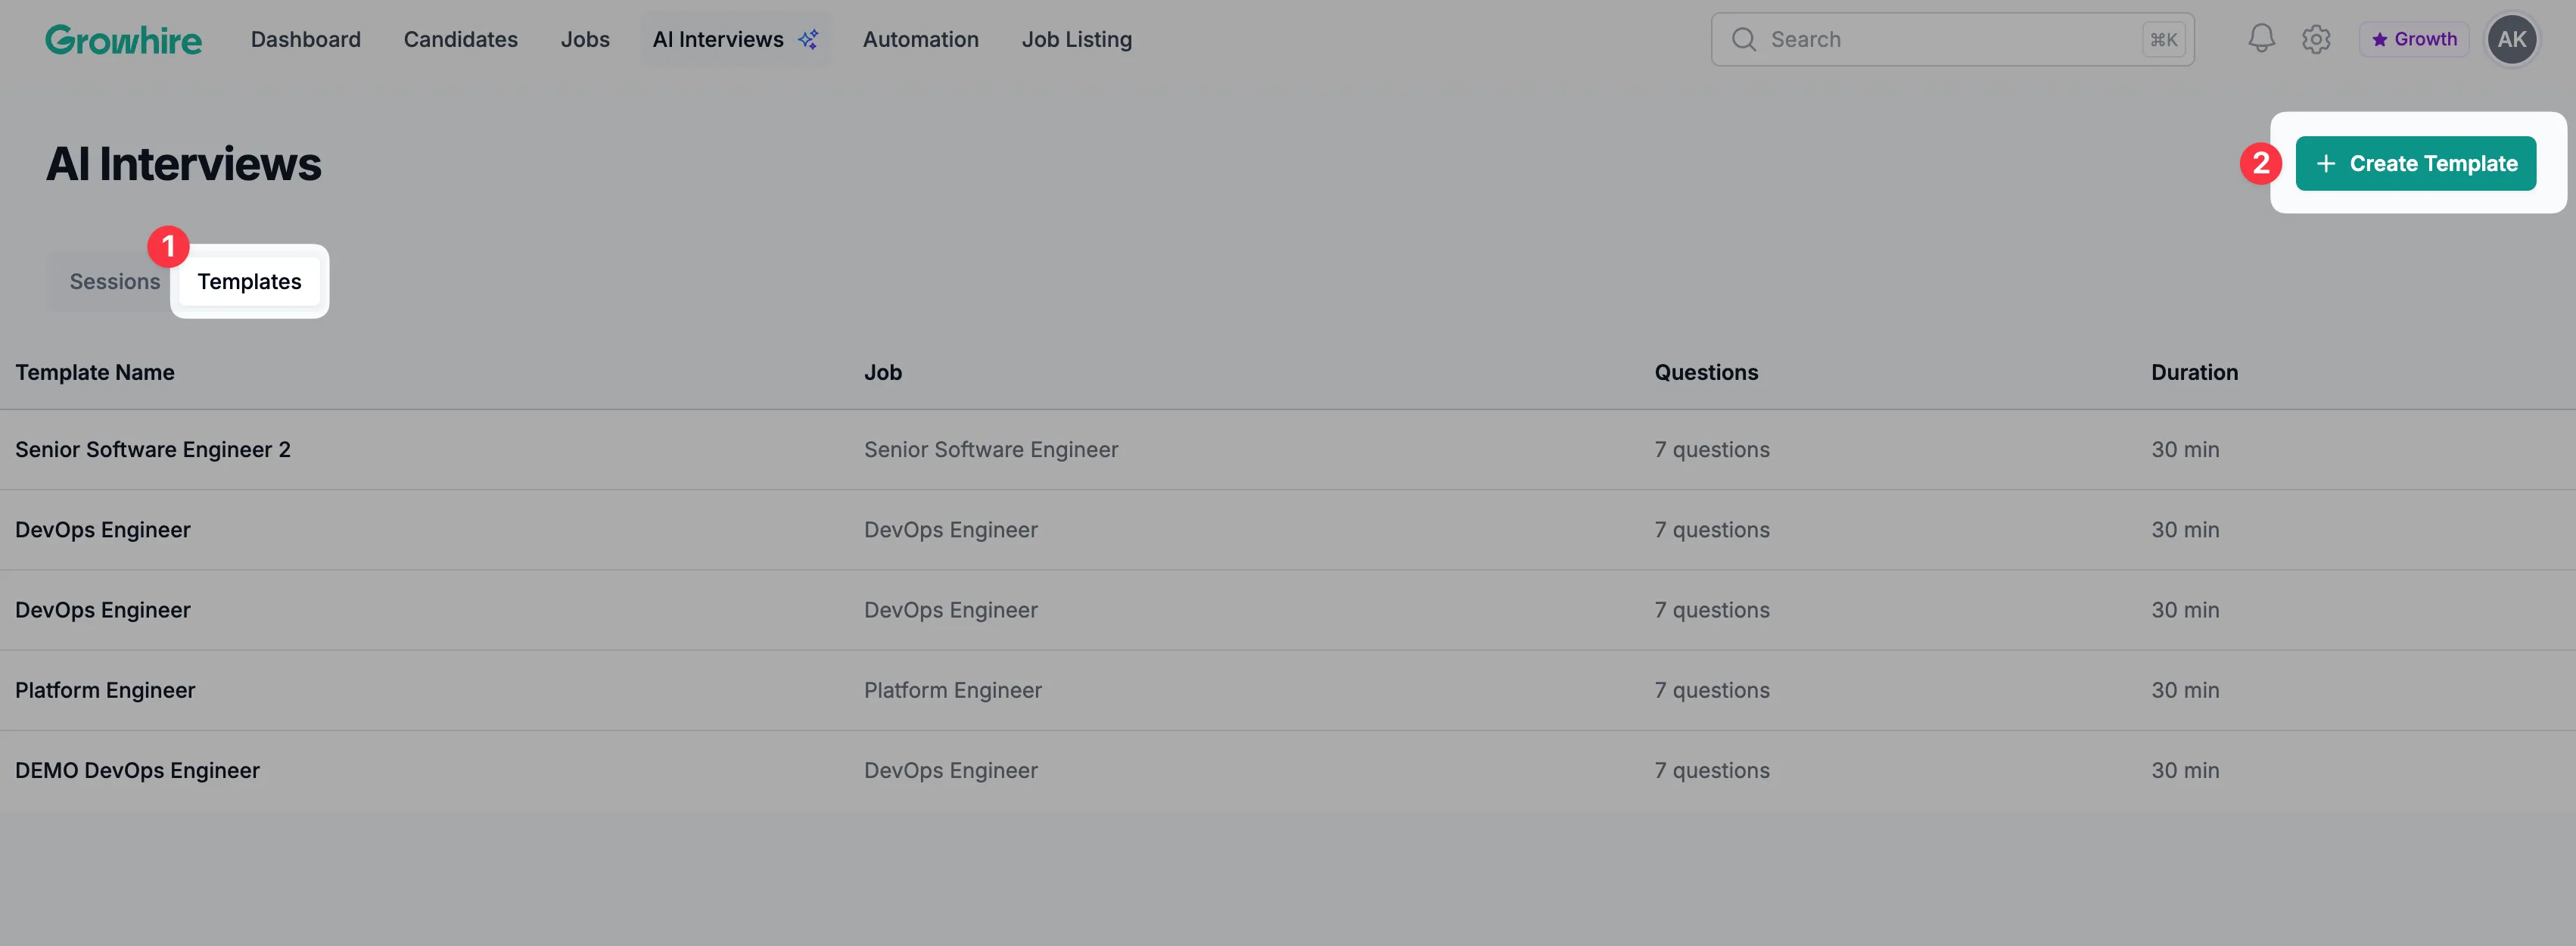
First, toggle to Templates and then select + Create Template.
A modal will appear, allowing you to update the interview’s basic settings, modify the questions, adjust the evaluation criteria, and preview the final setup.
Basic Settings
Section titled “Basic Settings”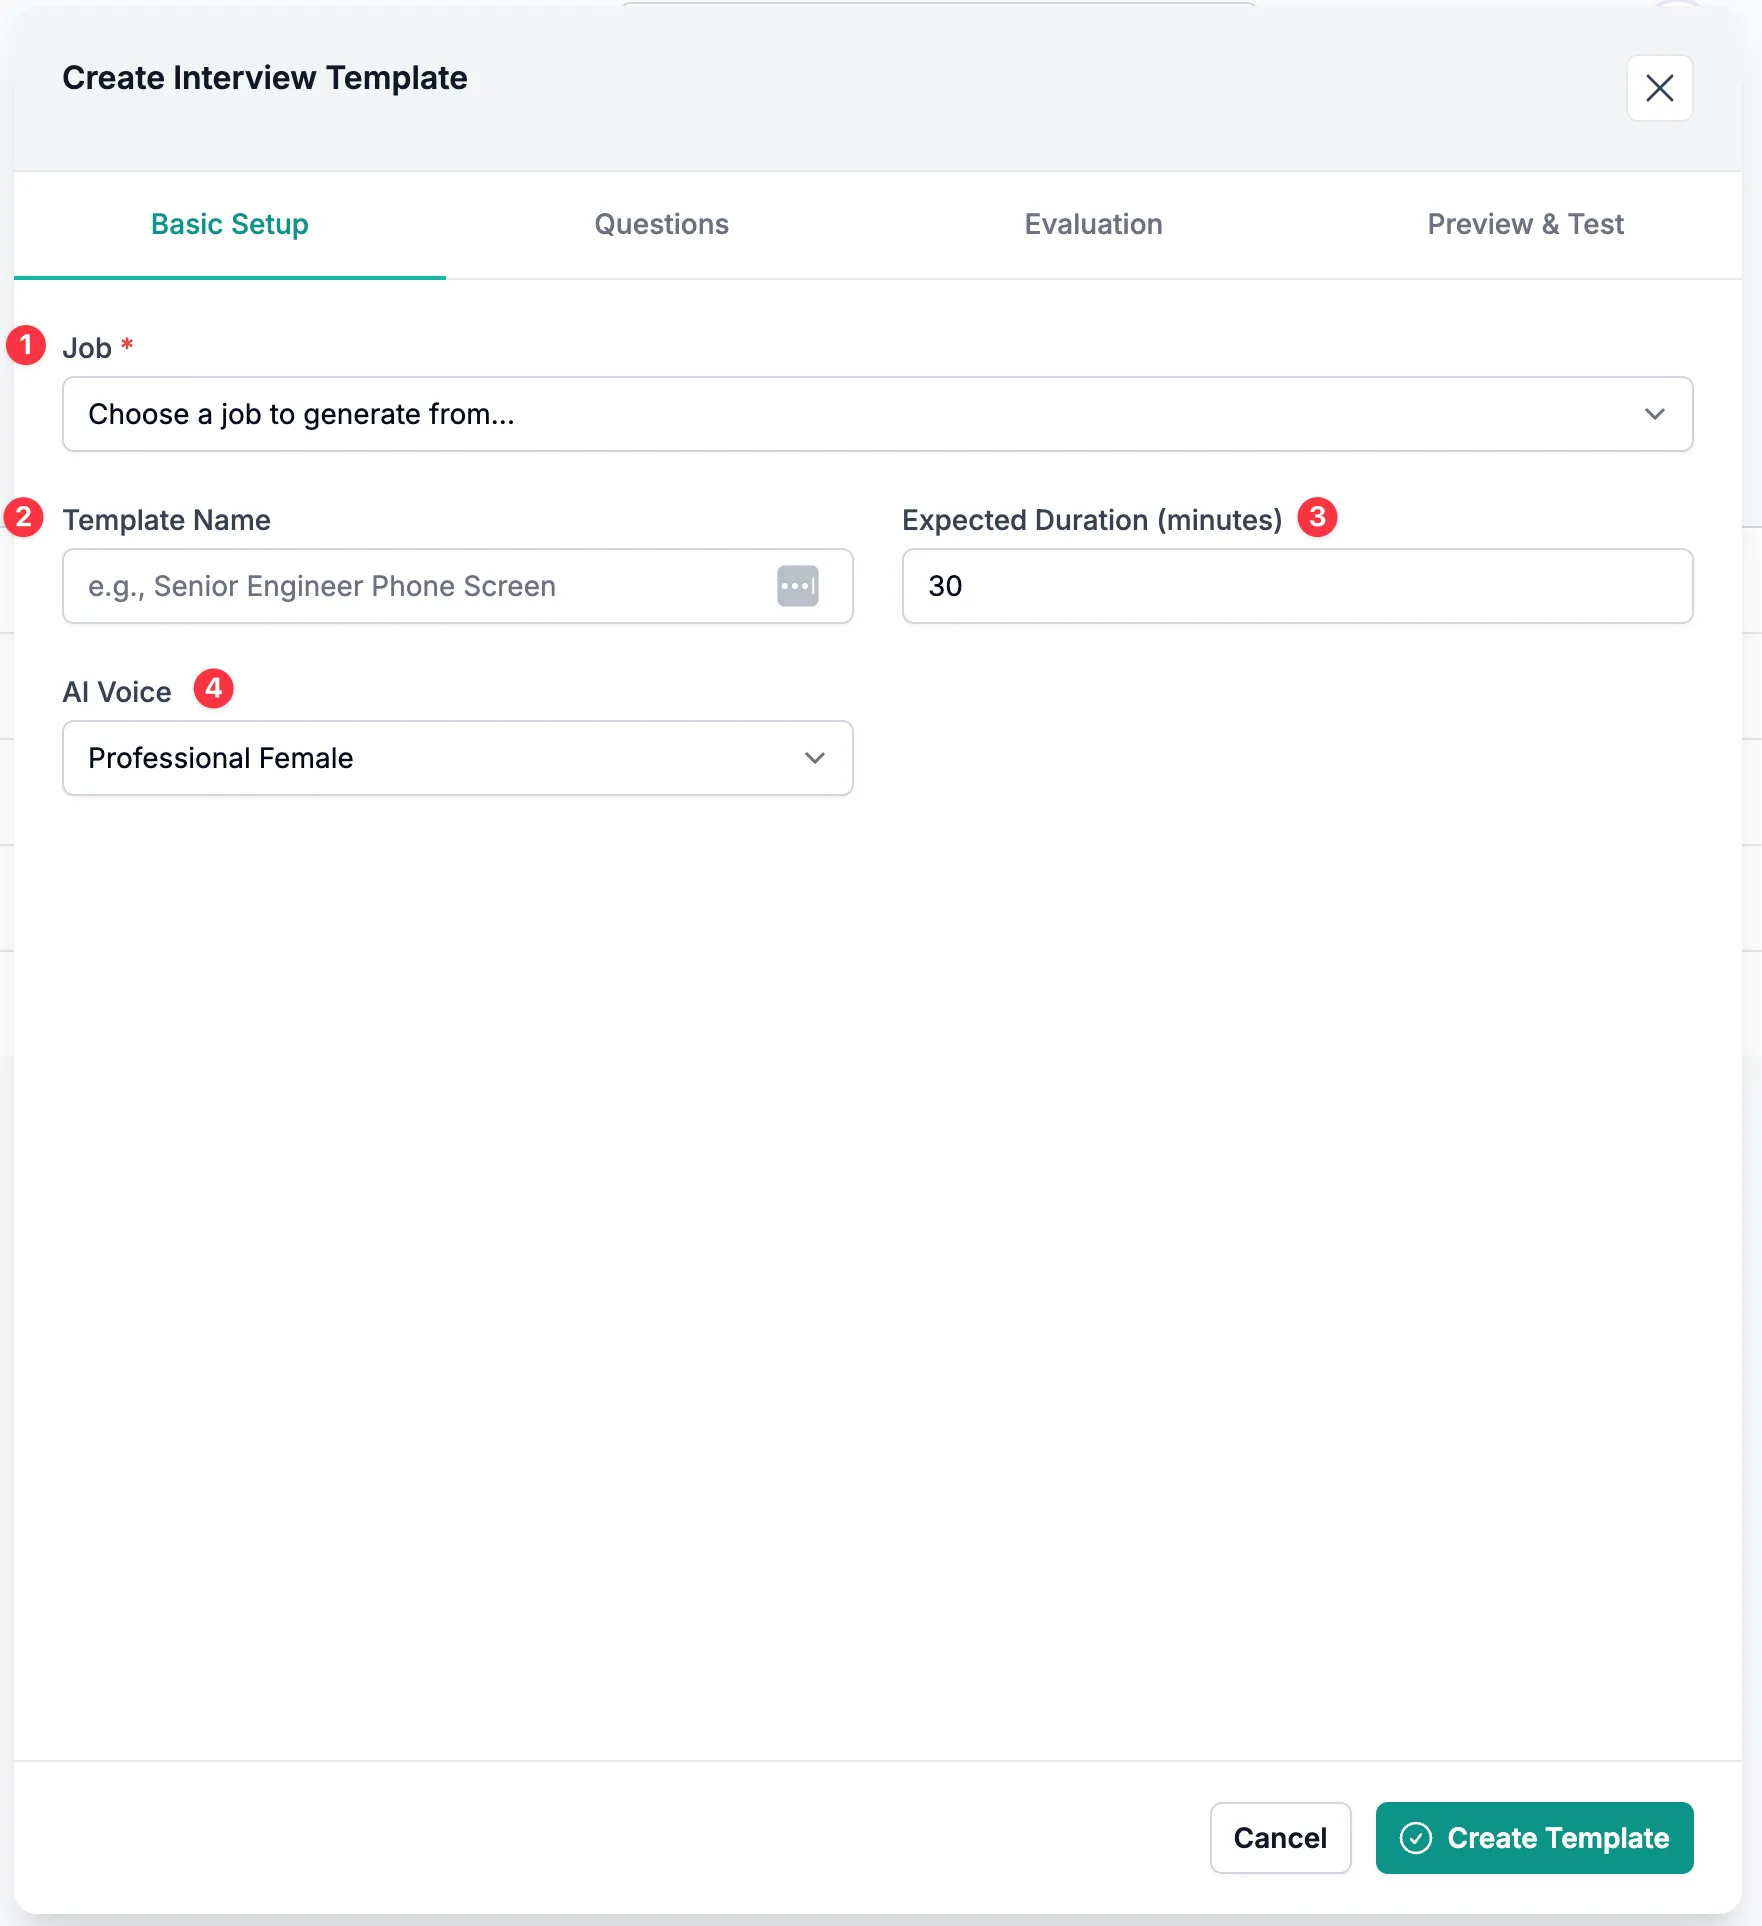
- Job: Select a job to provide context for the automatically generated interview questions.
- Template Name: Create a name for the template to reuse for future interviews.
- Expected Duration: Modify the expected duration of the interview.
- AI Voice: Select the type of AI voice to be used during the interview session.
Questions
Section titled “Questions”After selecting a job in the previous step, this section will automatically populate with recommended interview questions tailored to that role.
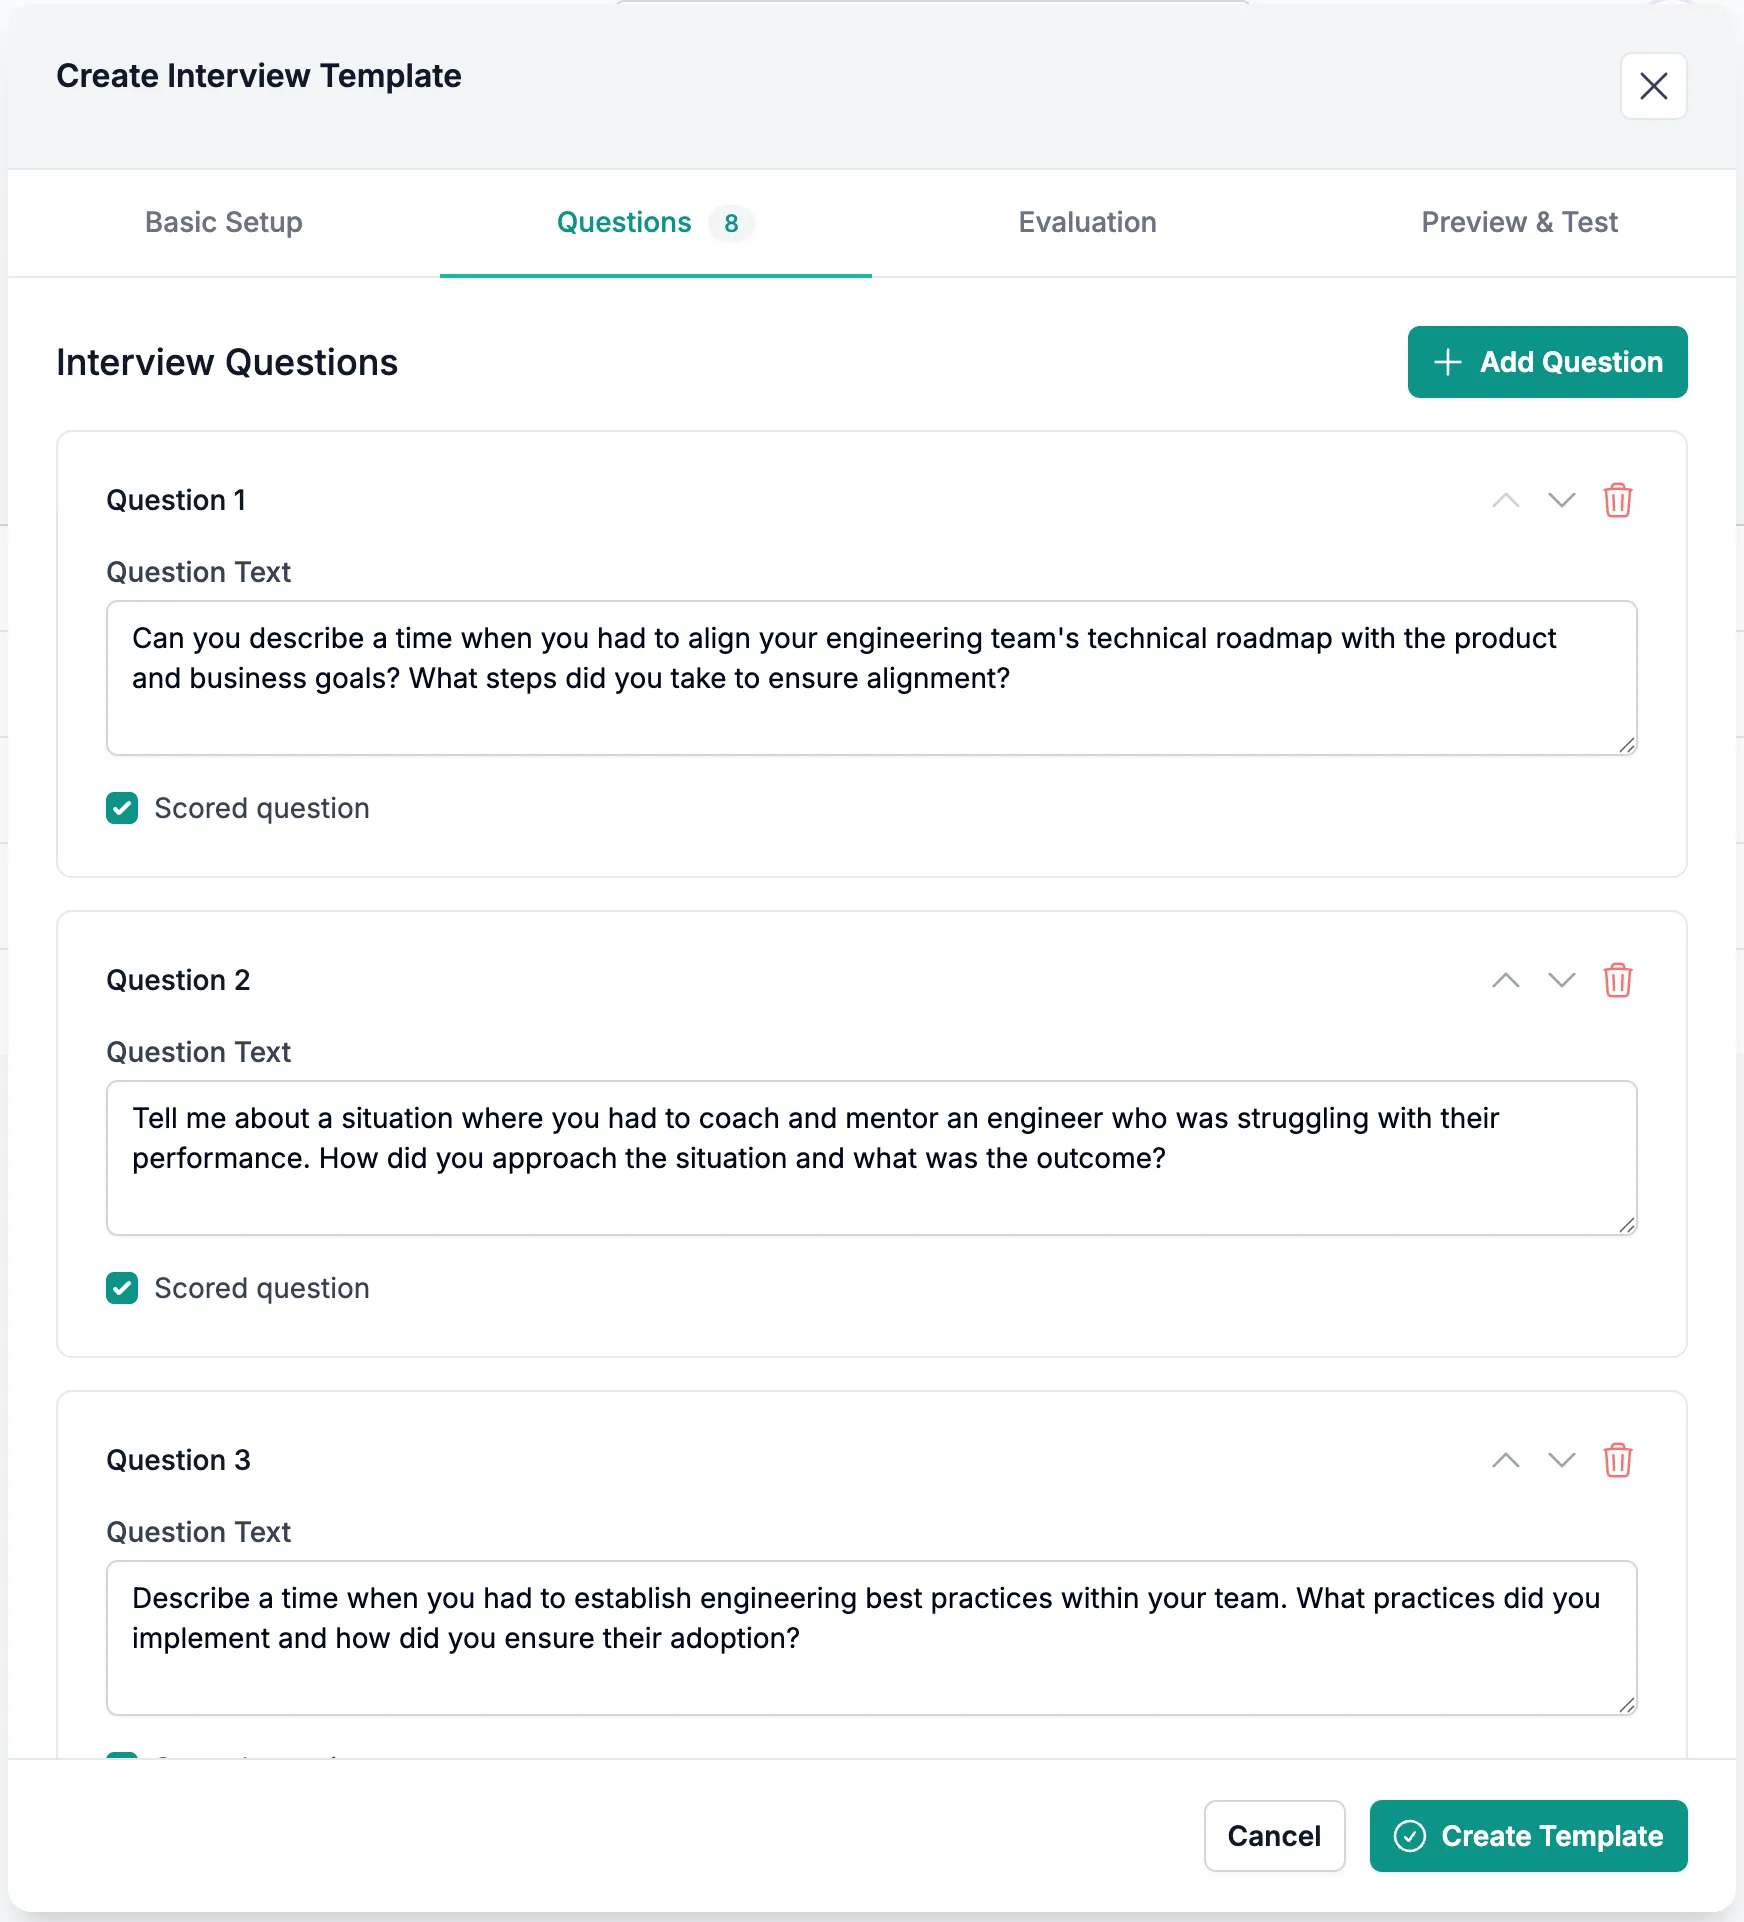
Once the questions are generated, you can customize them to fit your interview needs by editing the text, rearranging the order, or removing questions altogether.
Each question also includes a “Scored question” checkbox. When this option is selected, the candidate’s response will be evaluated using the scoring criteria configured in the next section. If the checkbox is left unselected, the question will still appear in the interview, but it will not be included in the formal evaluation.
Evaluation
Section titled “Evaluation”The criteria in this section are automatically generated based on the initial job selected and are designed to align with the competencies required for that role.
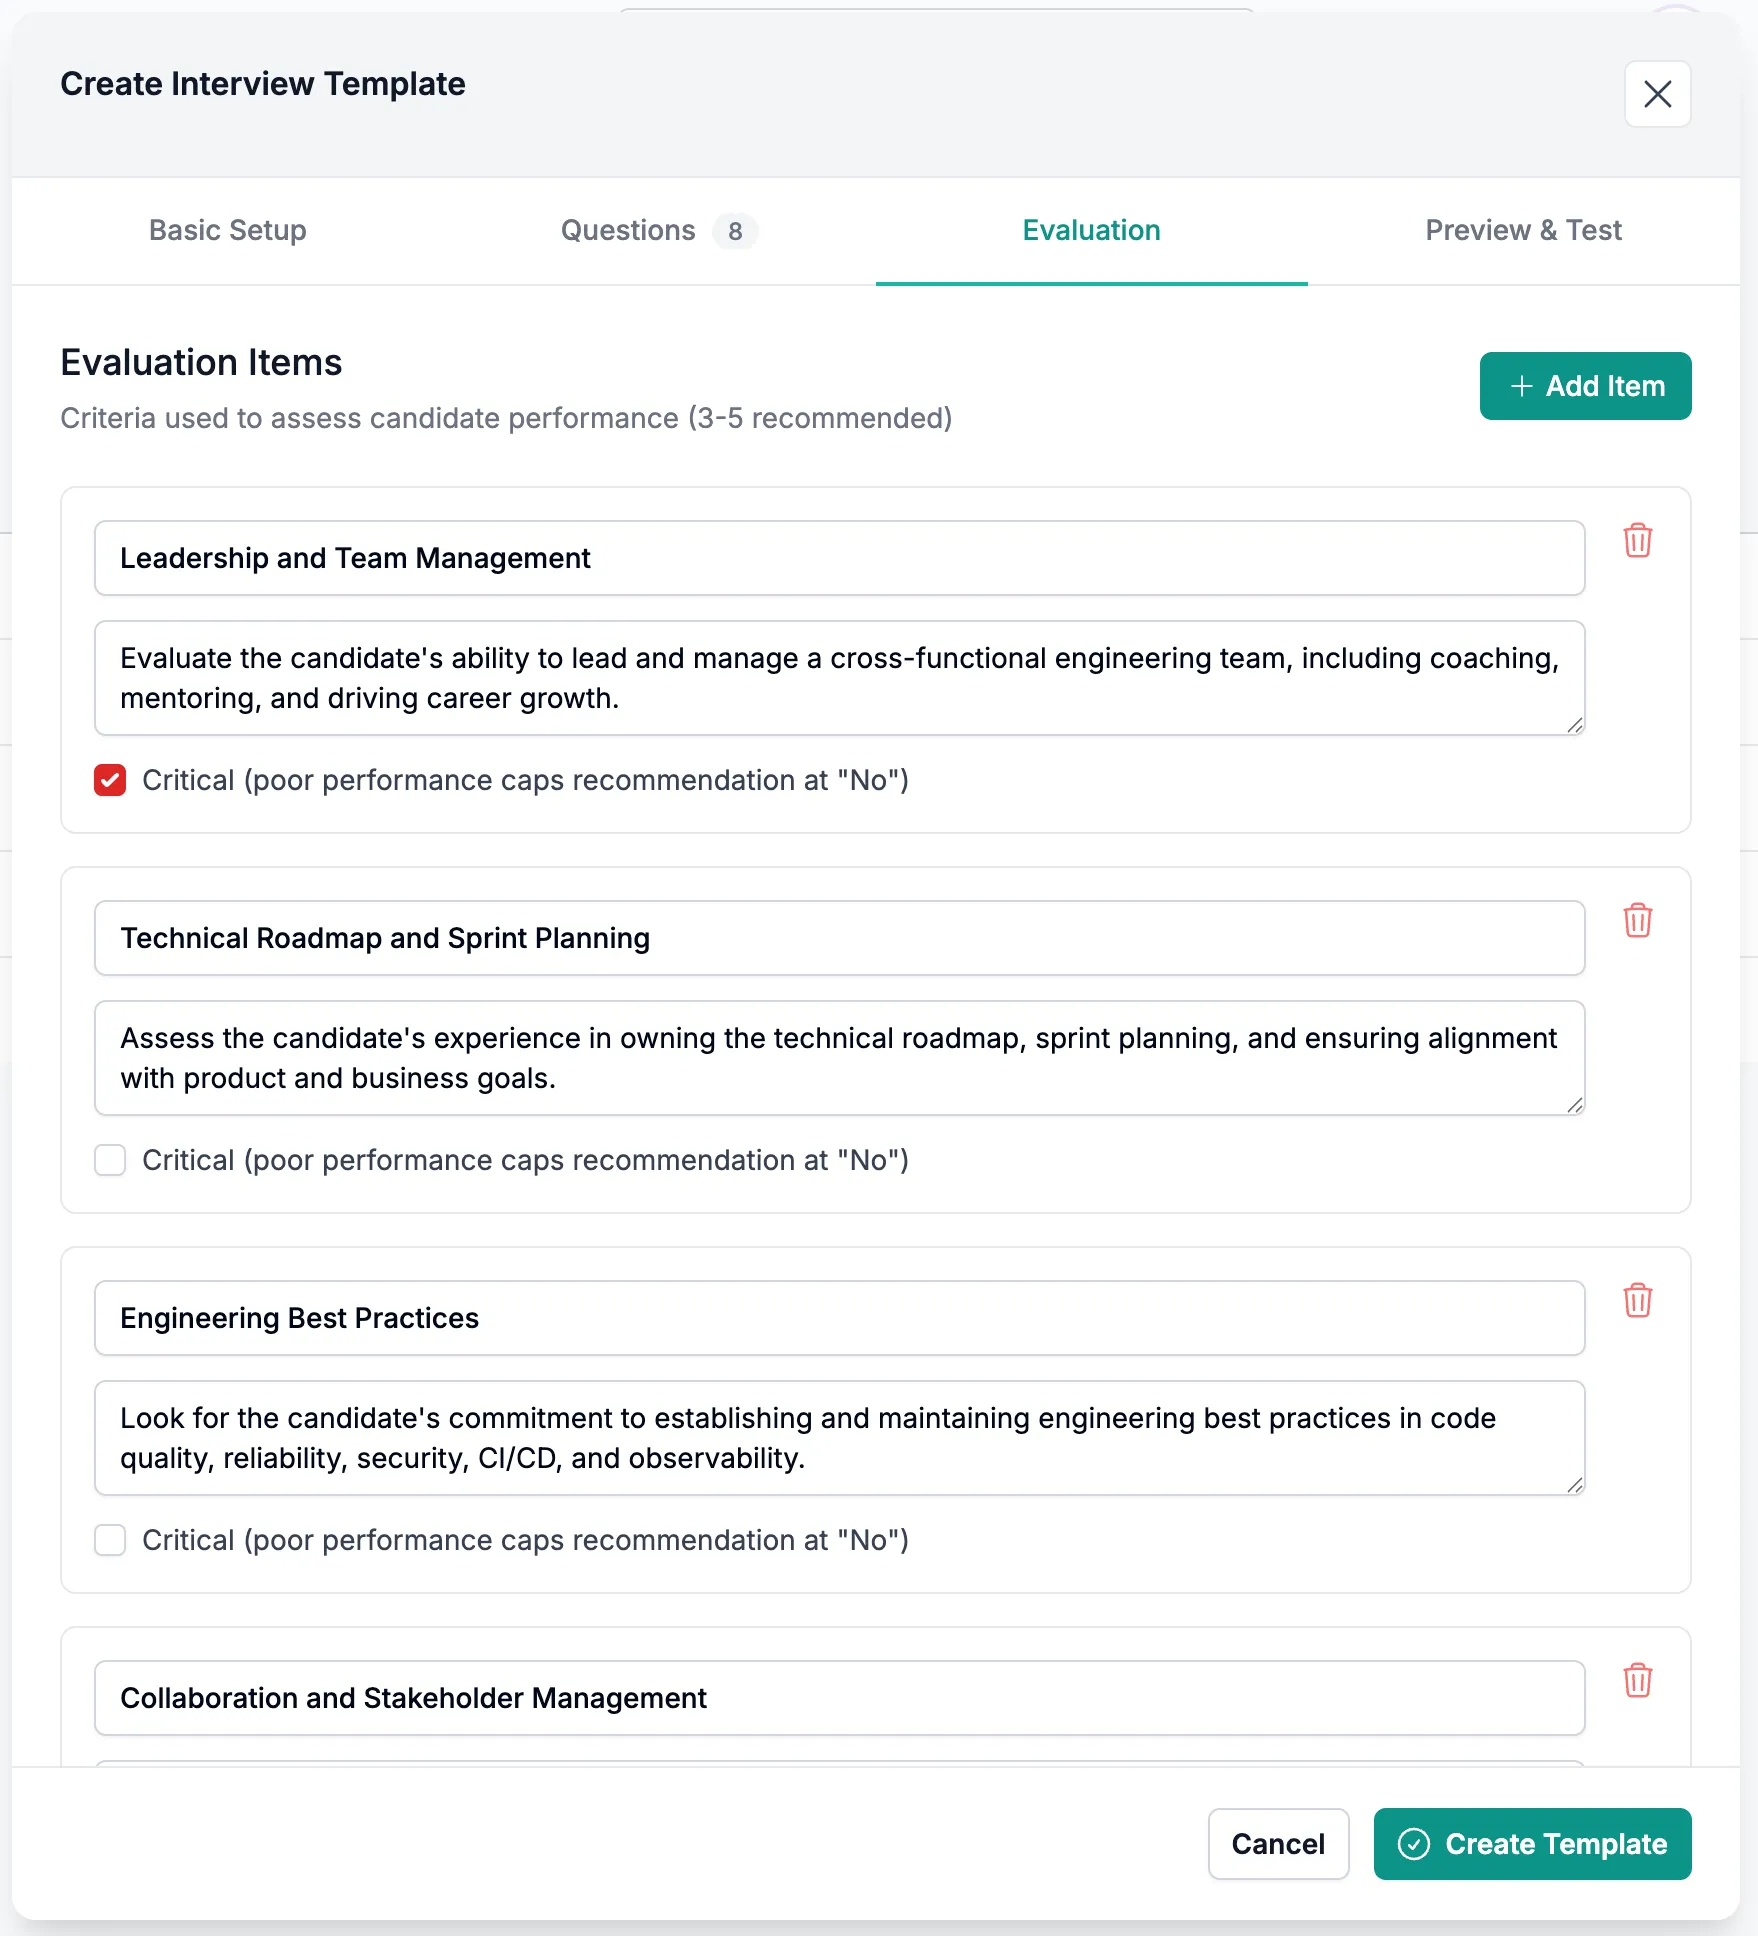
Each criterion can be edited to adjust the language or expectations, and any criterion that isn’t relevant can be removed.
Each criterion also includes a “Critical (poor performance caps recommendation at ‘No’)” checkbox. When selected, a candidate who performs poorly on that criterion will automatically receive an overall recommendation of No, regardless of their performance in other areas. If left unselected, the candidate’s overall recommendation will reflect their combined performance across all evaluated criteria.
Preview & Test
Section titled “Preview & Test”This section provides a consolidated view of everything you’ve configured in the previous steps, including the interview questions, scored questions, and evaluation criteria.
Use this page to confirm that the questions are ordered correctly, the appropriate questions are marked as scored, and the evaluation criteria accurately reflect your requirements.
Then, click Create Template to finalize and save your interview template.
Invite candidates to an AI Interview
Section titled “Invite candidates to an AI Interview”There are two ways to invite candidates to complete an AI interview: sending an interview session directly or sending a customized email with an AI interview link.
Option 1: Send an Interview Session Directly
Section titled “Option 1: Send an Interview Session Directly”To send an interview directly to a candidate, navigate to Sessions and click Create Interview.
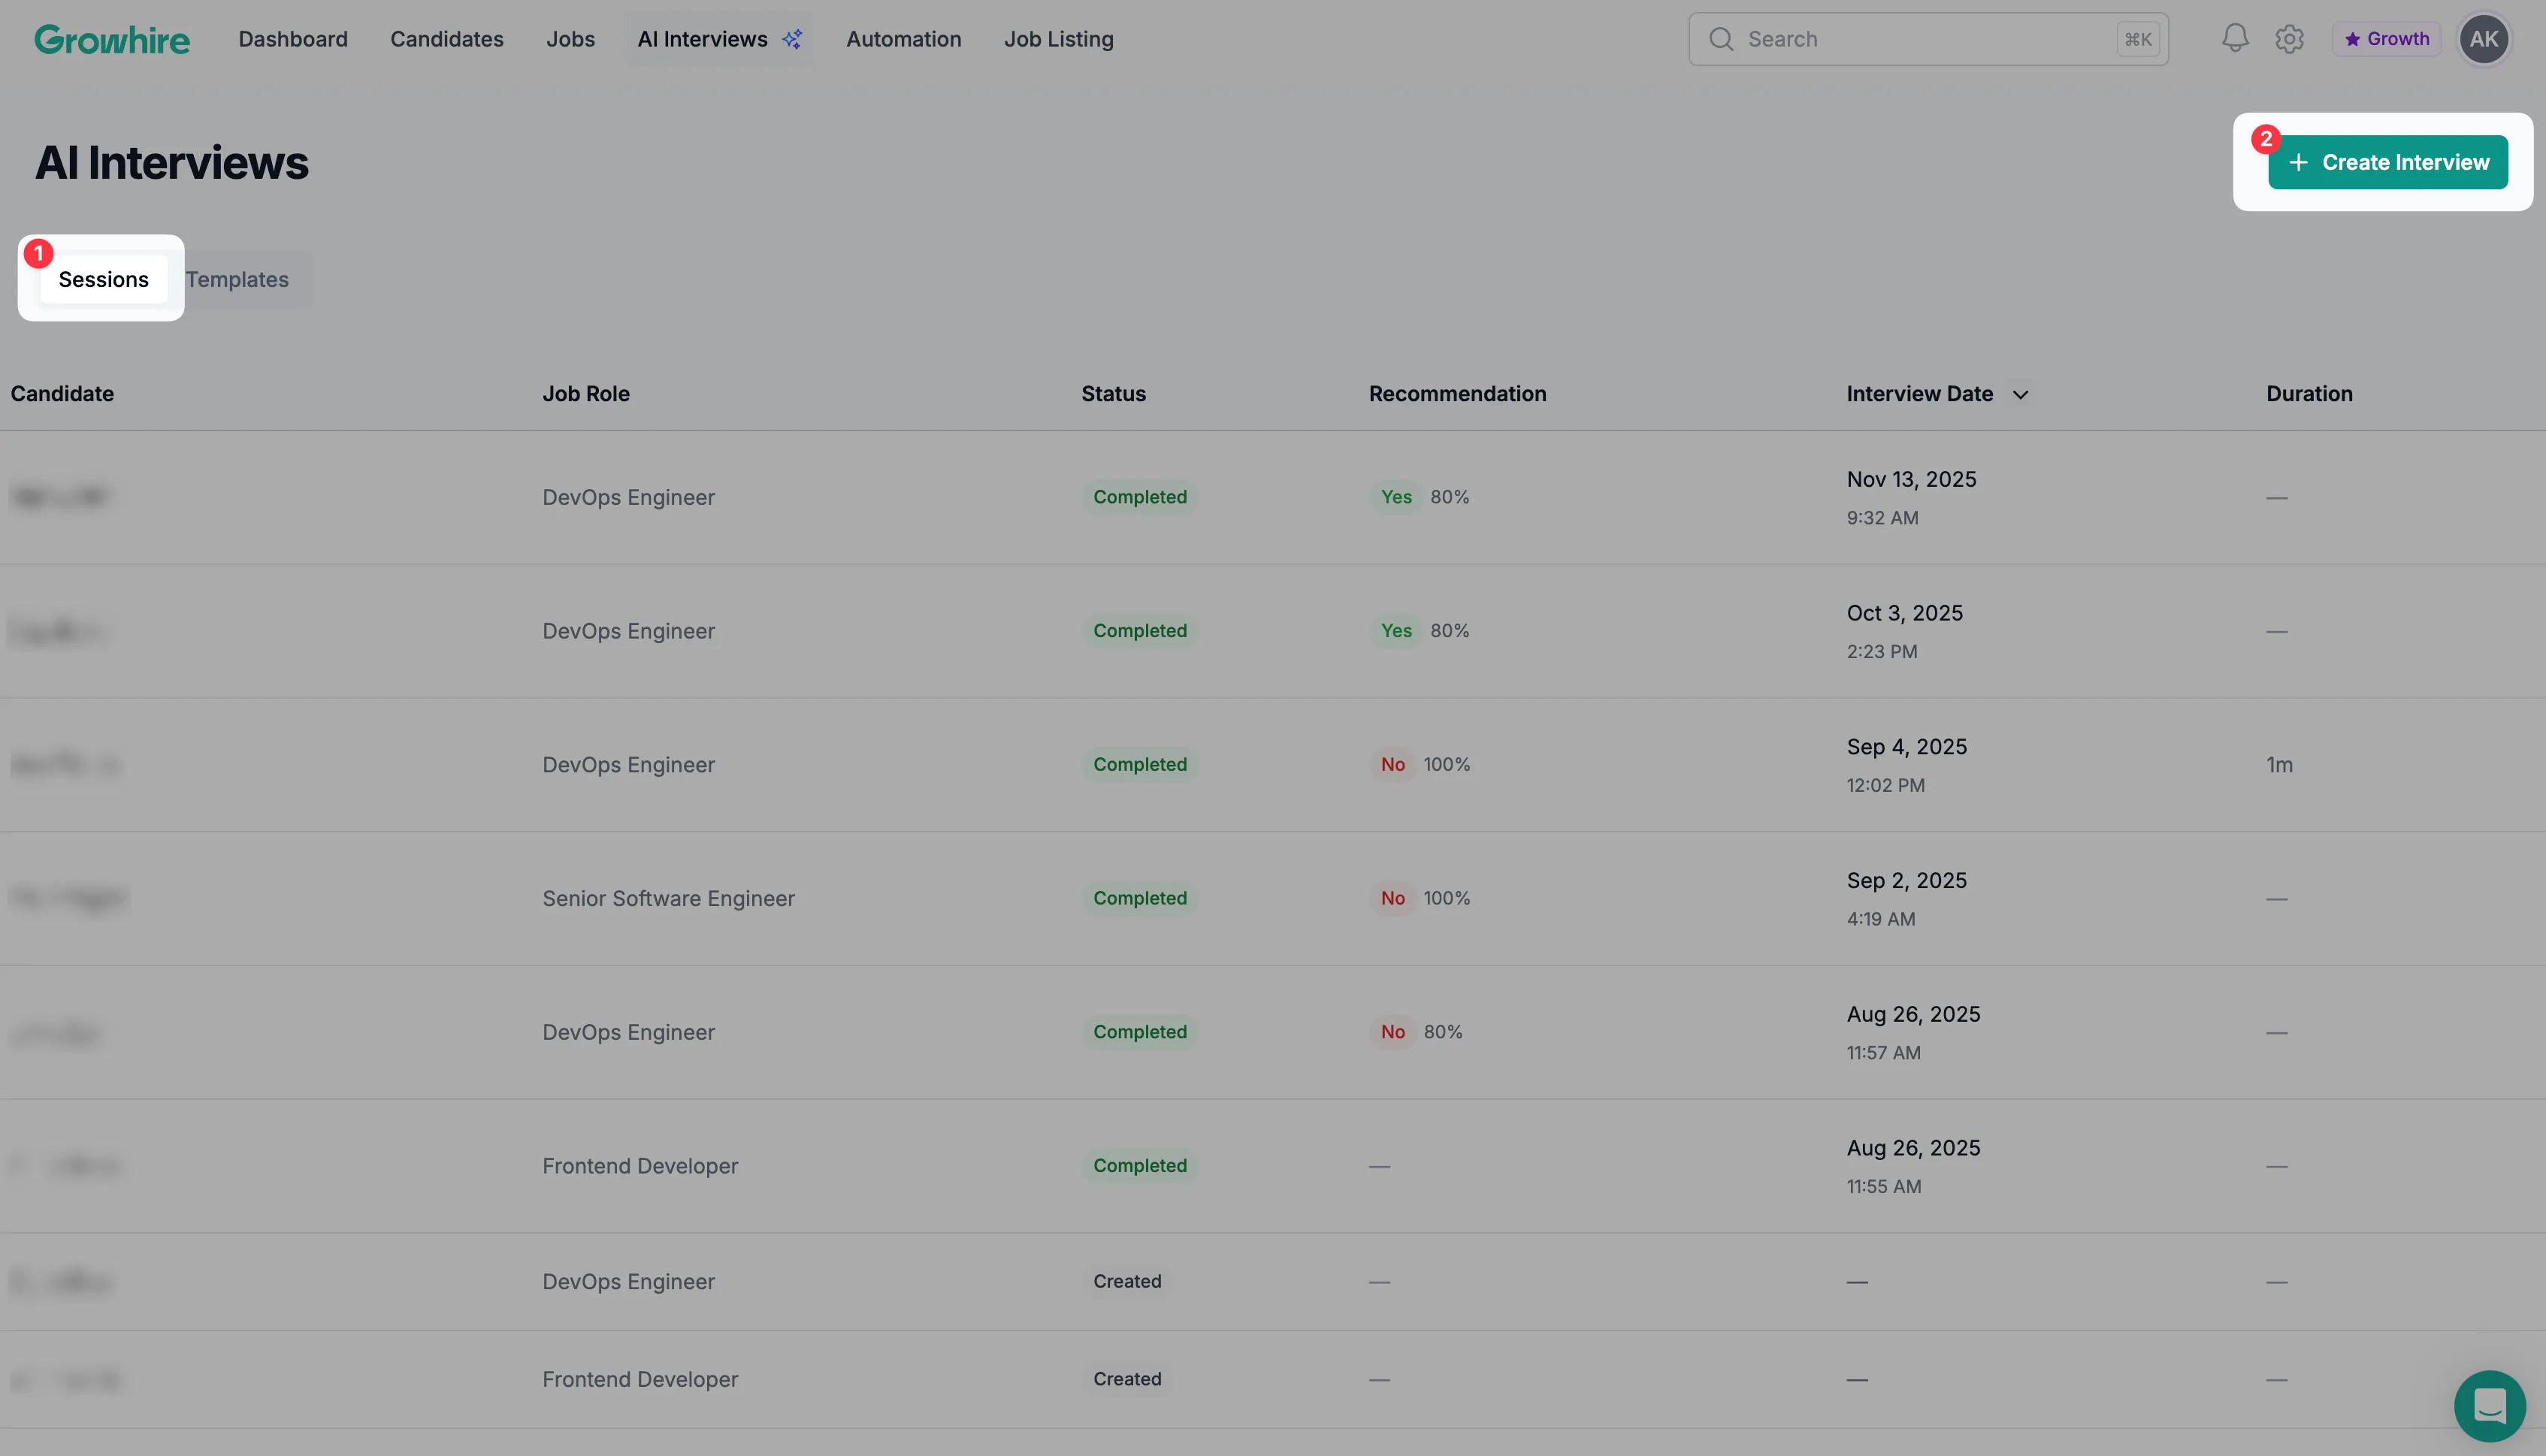
From there, a modal will appear allowing you to select the candidate and choose the appropriate interview template.
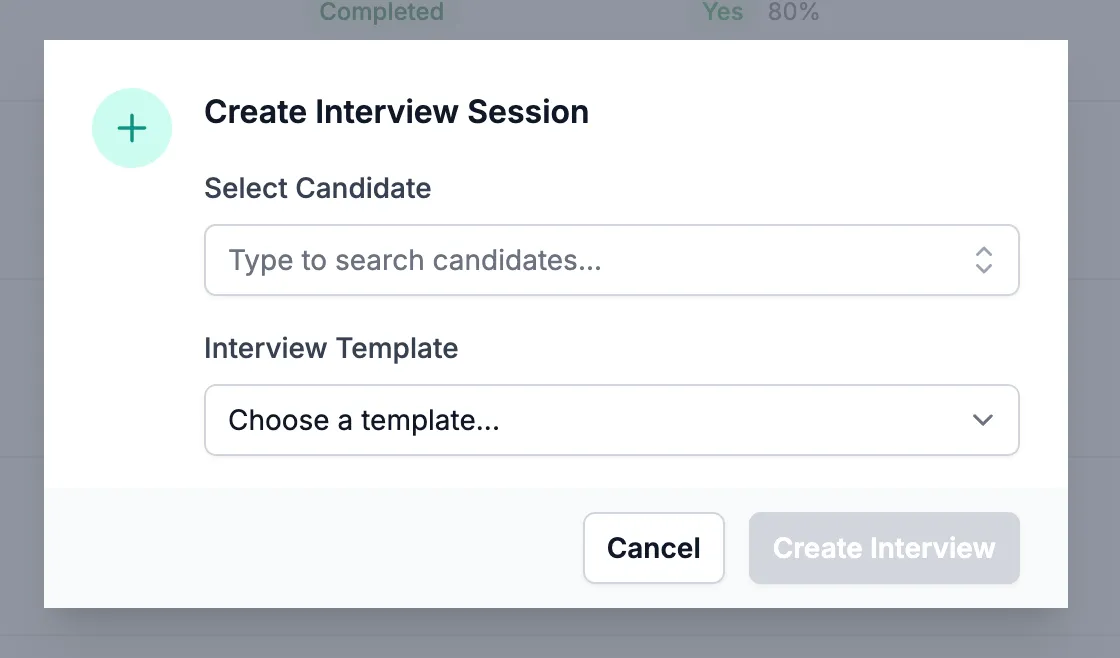
Once created, the candidate will automatically receive a private email invitation to participate in the AI interview. The link included in the email is unique to that candidate and cannot be accessed by others.
Option 2: Send an Email with an AI Interview Link
Section titled “Option 2: Send an Email with an AI Interview Link”You can also invite candidates by embedding an AI interview link within a customized email.
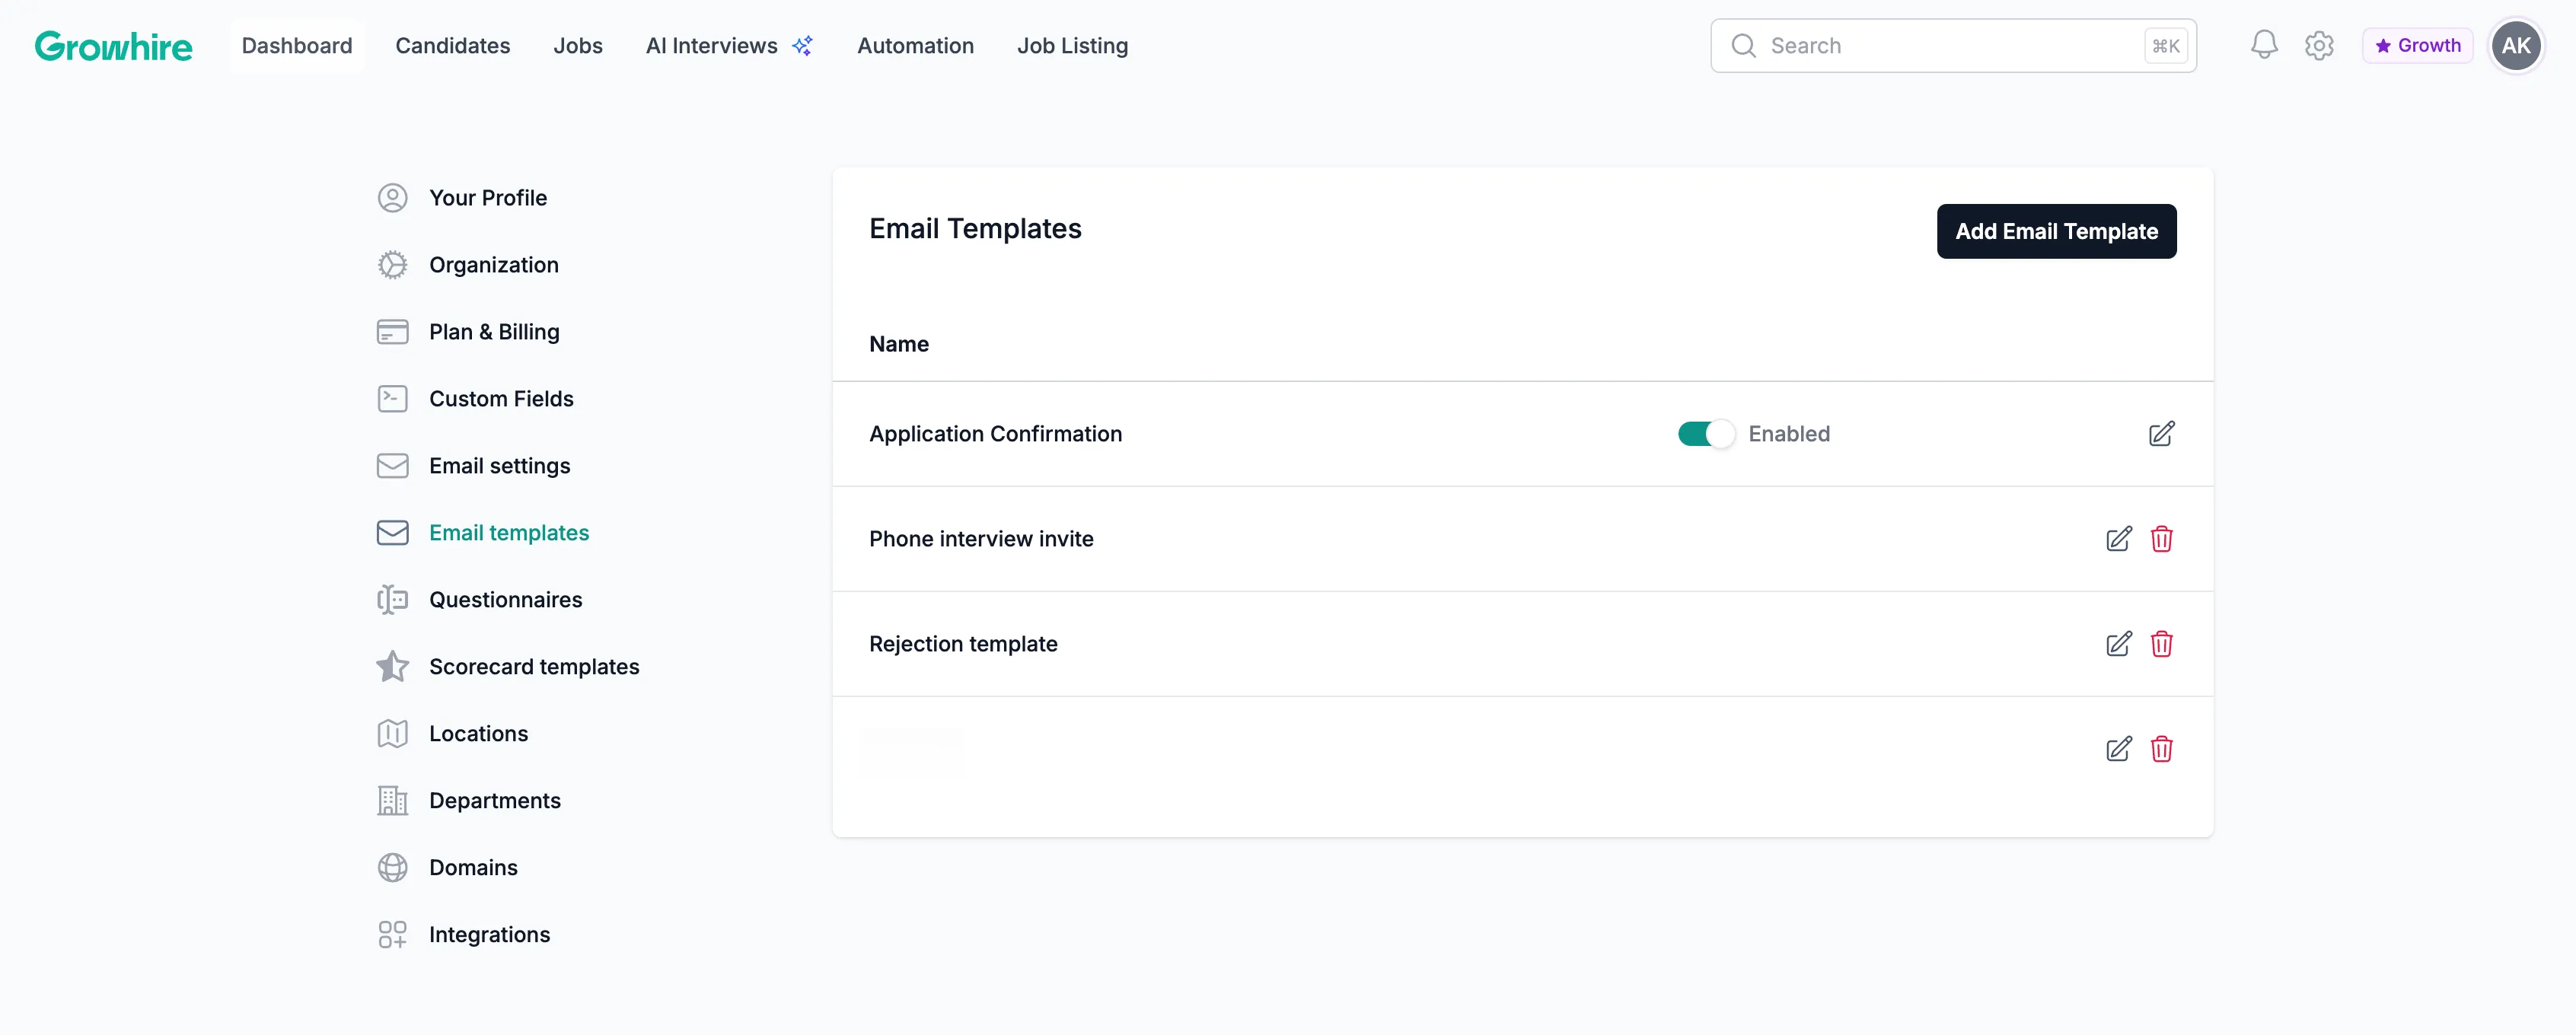
First, click the gear icon to access your account settings. Navigate to your Email templates and then add a new email template or modify an existing template.
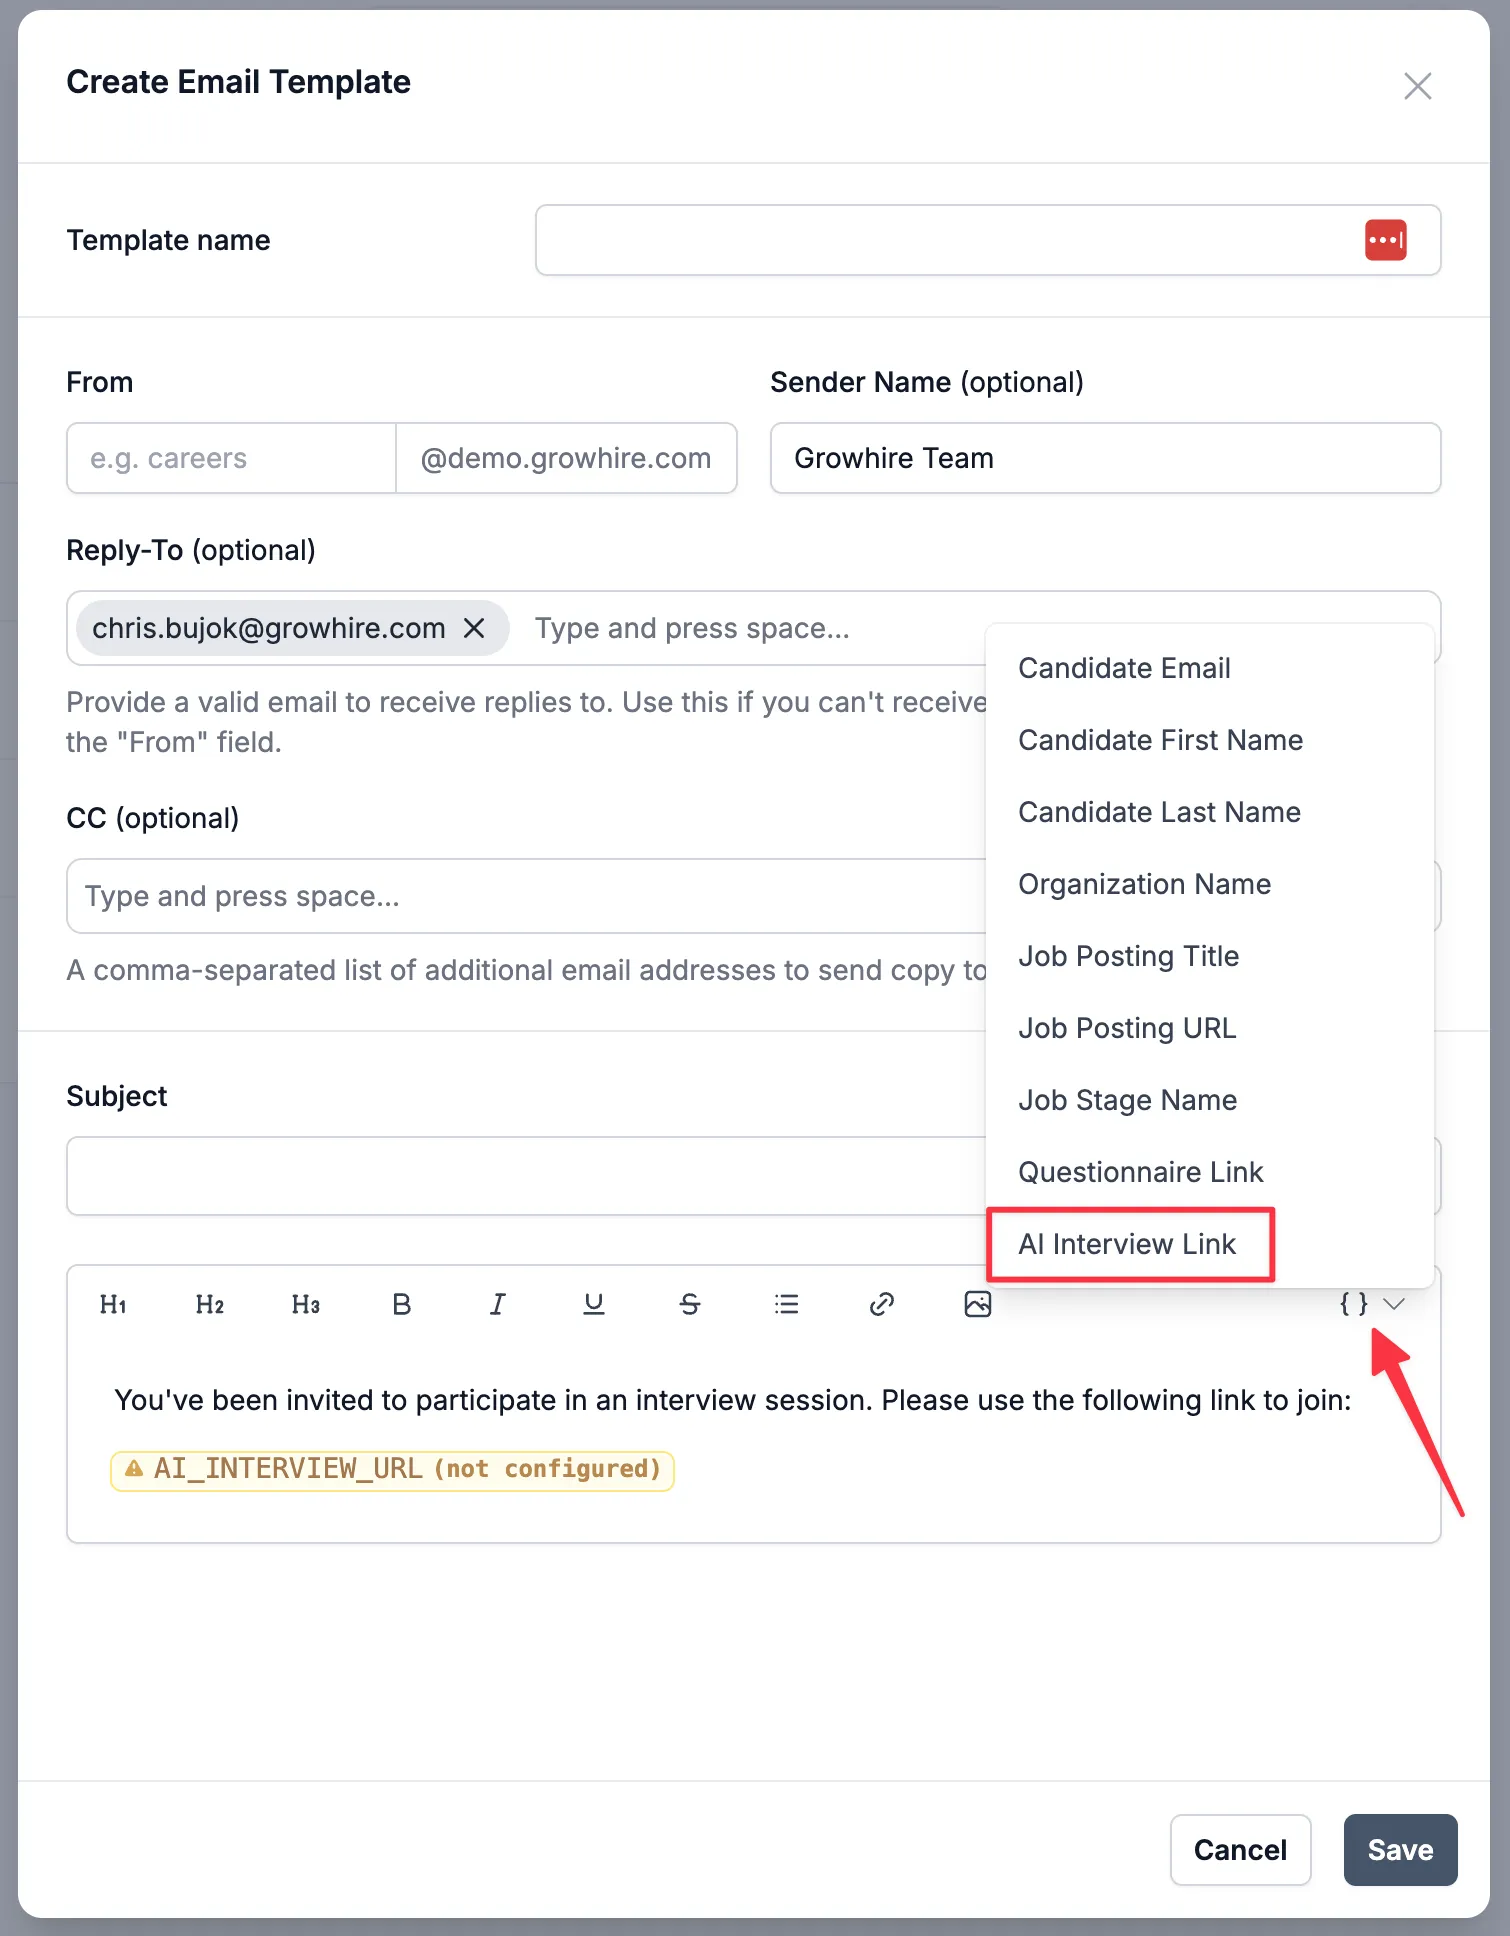
In the email body, click the brackets icon to insert a variable. Select the variable labeled AI Interview Link. Once added, the link will appear highlighted in yellow.
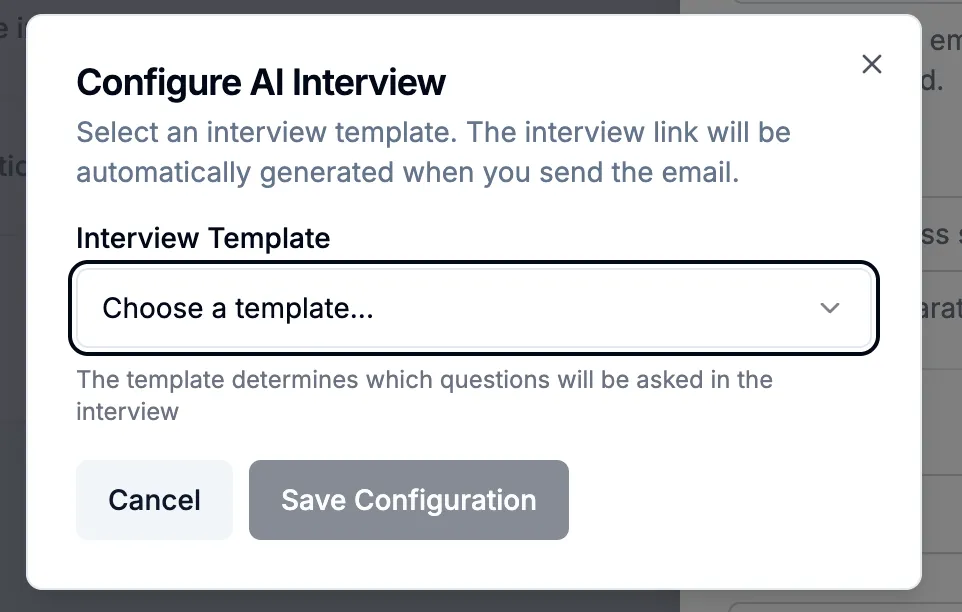
Click the highlighted link to configure the interview. You will be prompted to select the appropriate template.
After configuration is complete, the link will appear highlighted in green, indicating it is properly set up and ready to send.
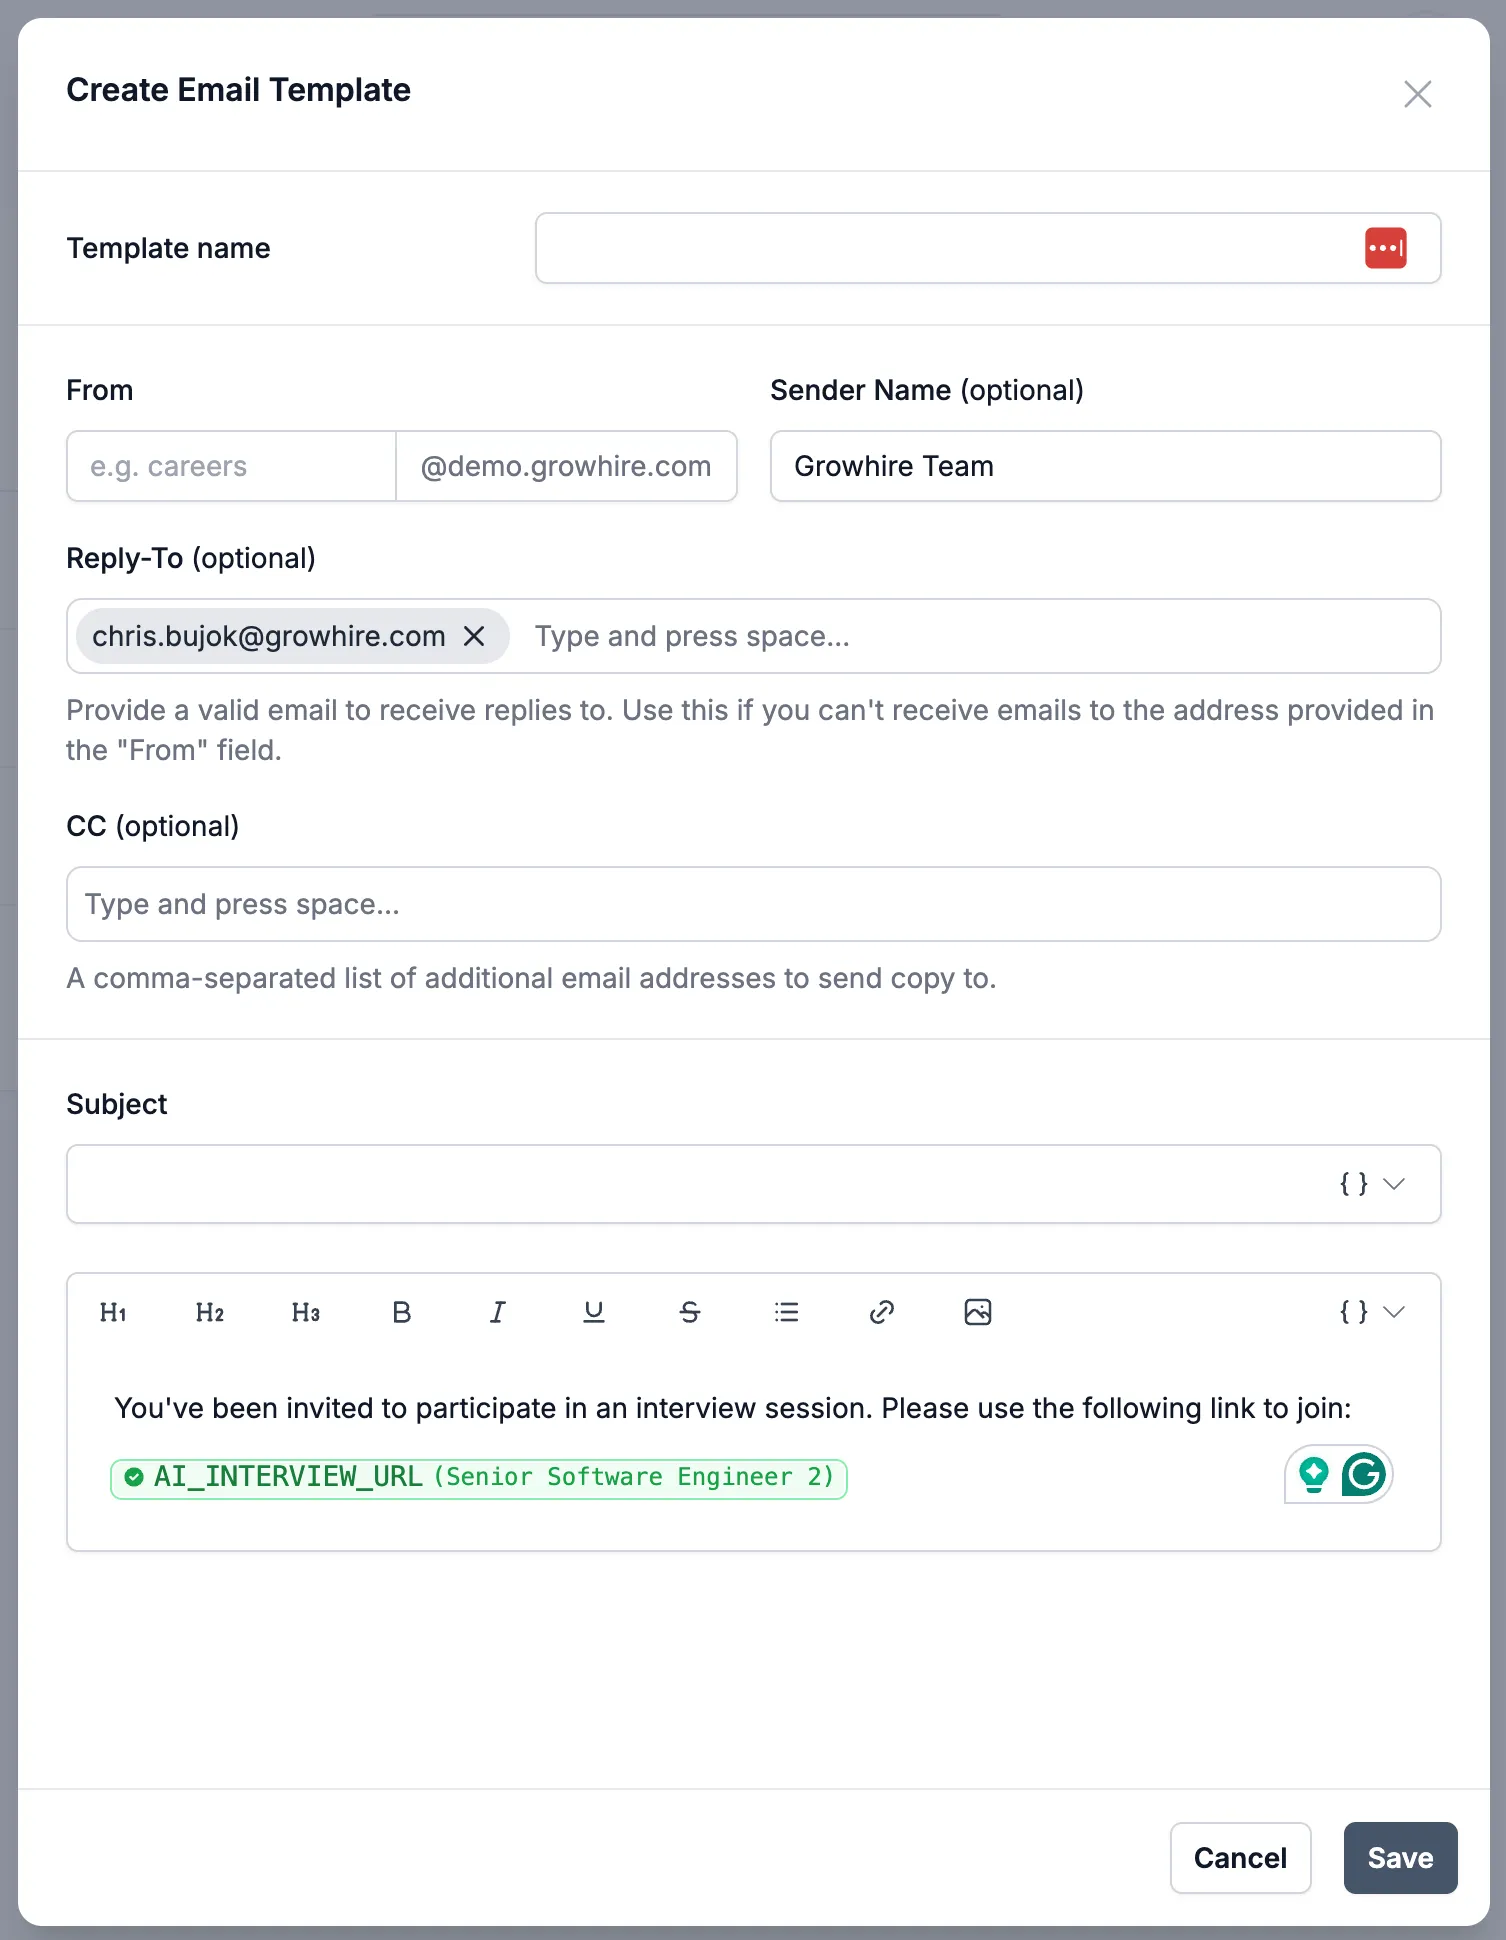
Once you send the email, each candidate will receive a private interview link tied specifically to them. Since emails can be sent to multiple candidates at once, this method allows you to quickly distribute AI interview invitations at scale while still ensuring each candidate receives a unique, private link.
Candidate interview report overview
Section titled “Candidate interview report overview”Once a candidate completes an AI interview, you can review their results by navigating to Sessions and selecting the specific candidate.
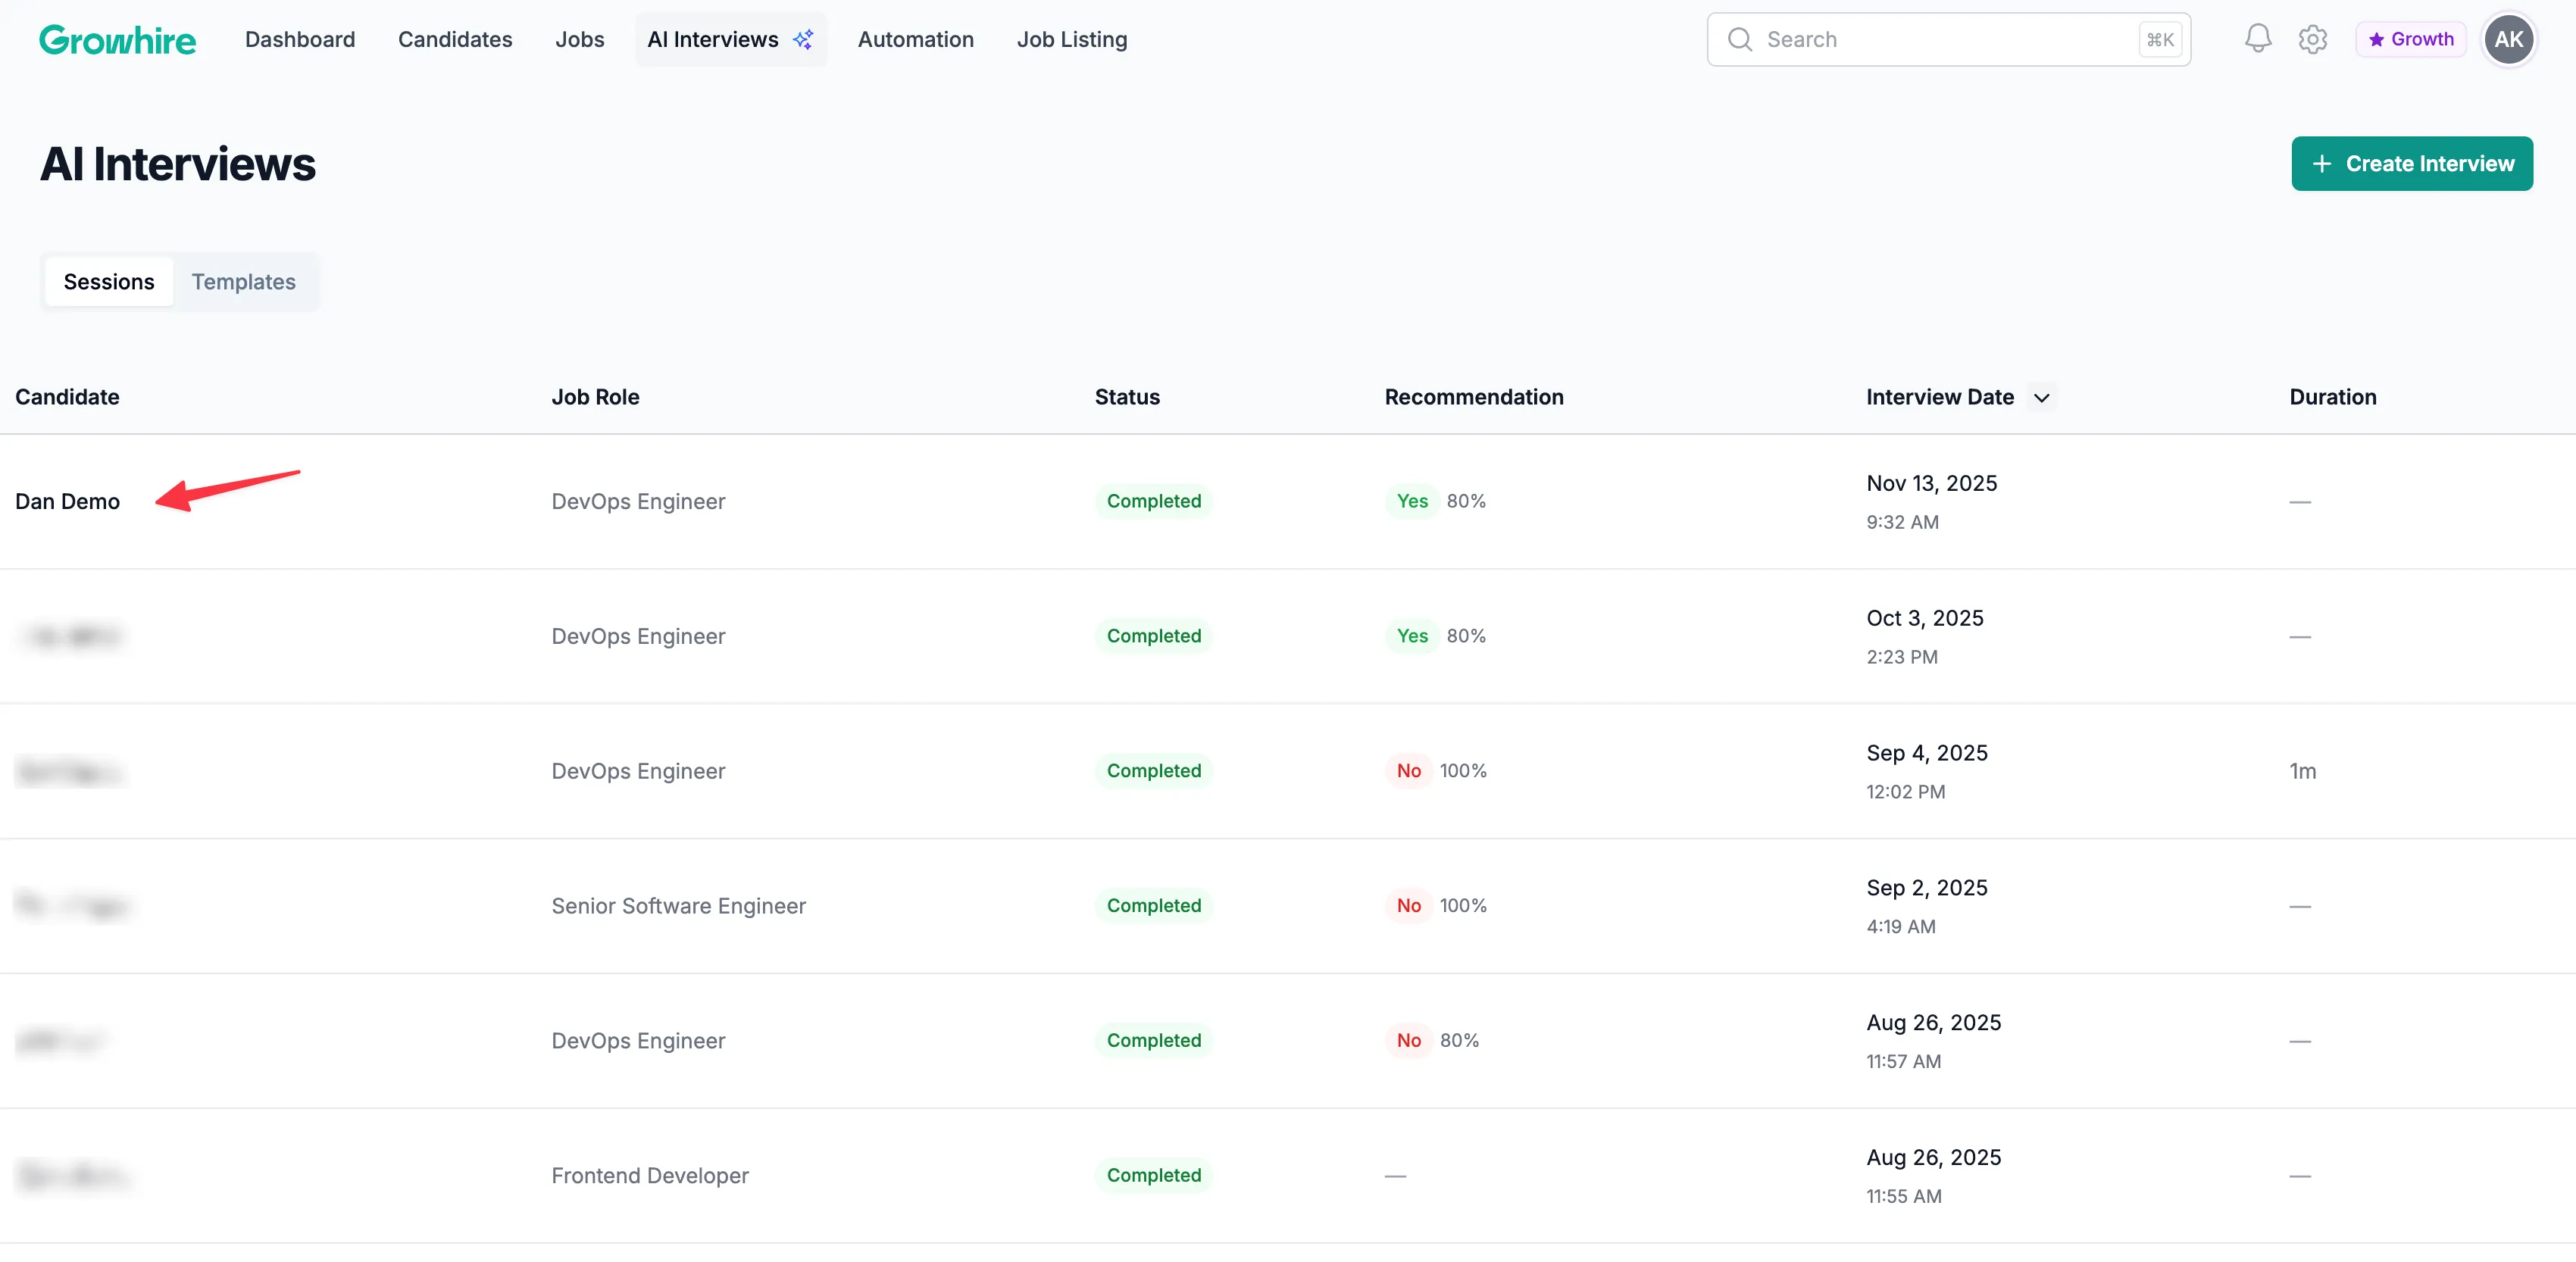
1. Details
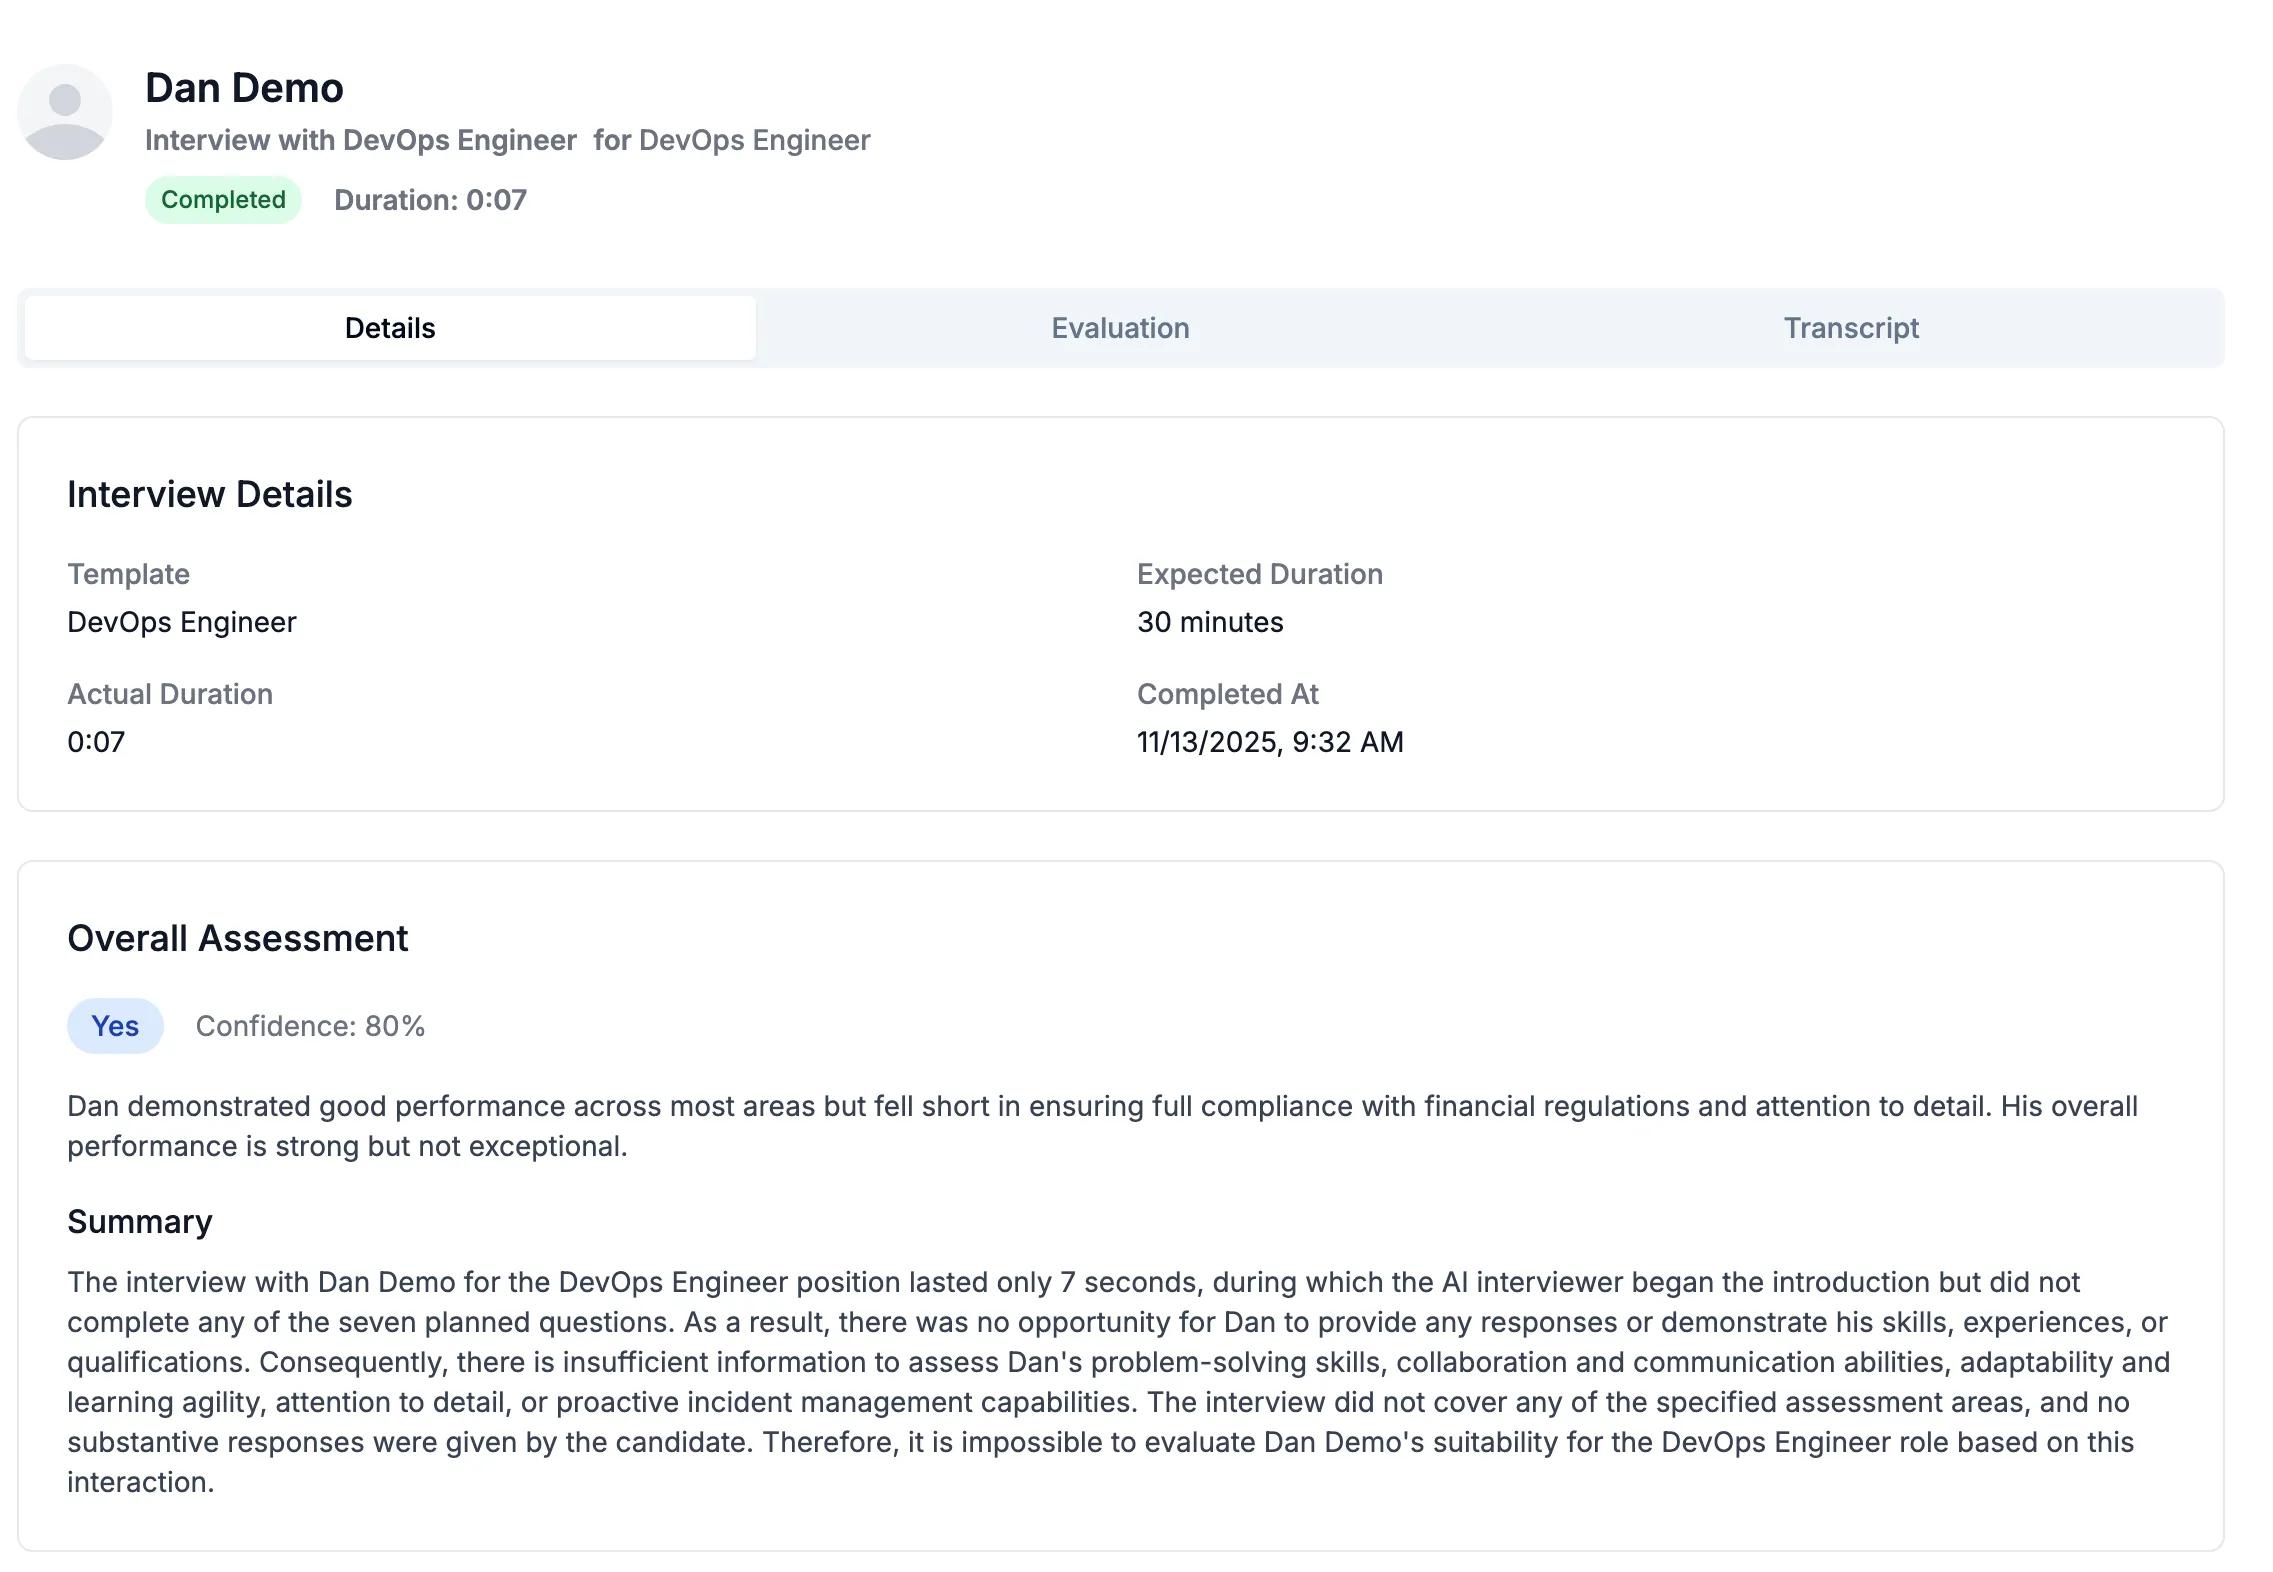
Section titled “1. Details”This section provides a high-level overview of the interview, giving you a clear snapshot of the candidate’s performance at a glance.
2. Evaluation
Section titled “2. Evaluation”This section breaks down the candidate’s performance. You’ll first see each interview question, along with its corresponding score and confidence score based on the candidate’s response.
Below that, performance is summarized against the evaluation criteria, including a score and confidence percentage for each competency.
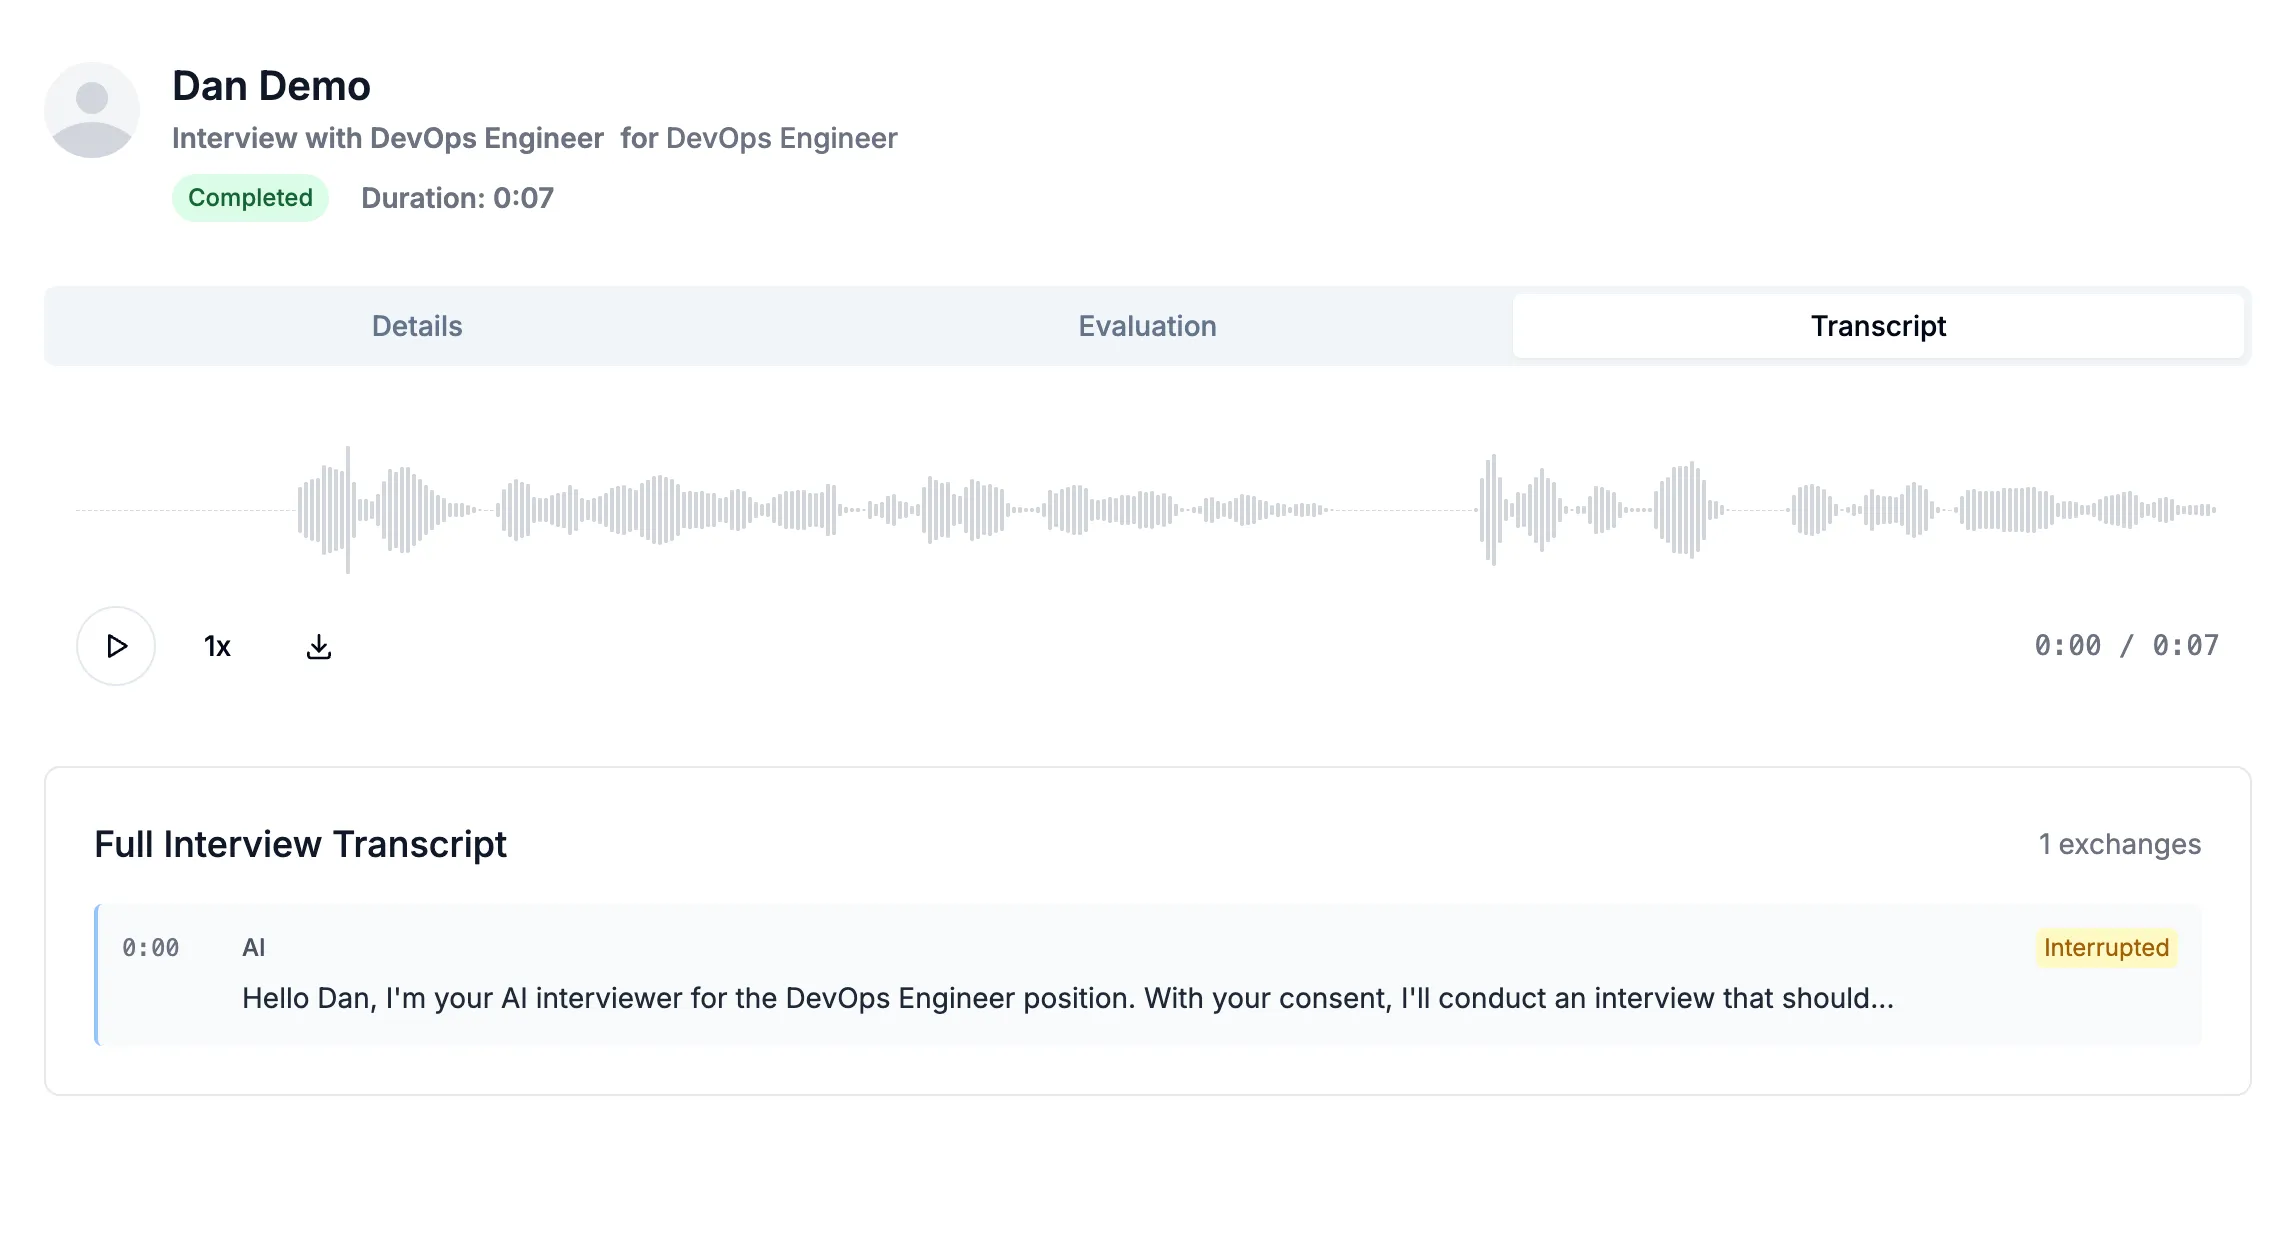
3. Transcript
Section titled “3. Transcript”This section includes the full audio recording of the interview and a complete written transcript, allowing you to review or revisit the candidate’s responses in detail.